GUI Guider是恩智浦推出的一个PC端开发工具,专门用于开发LVGL GUI界面的图形化开发工具。LVGL是一个非常不错的开源gui,一直想试一试的。这次主要分享自己移植lvgl,以及利用GUI Guider开发基于lvgl的界面设计。 GUI Guider早就安装了1.0版本,也试着创建项目看了看,发现目前支持的开发板有点少,而且自己还没有那些板子。就一直想着移植到其他板子上玩玩。这次研究了一下,也参考网上的一些资料,成功移到自己的板子上了。现在来分享一下本次研究过程。
初始计划是先移植lvgl在自己的板子上无OS运行,然后再移植GUI Guider设计的界面代码,再实现输入设备操作。
本次板子使用的LPC55S69开发板,外带ili9488控制LCD,lcd屏320*480分辨率。lcd驱动已经完成,准备移植lvgl。首先将lvgl代码复制到工程目录下。
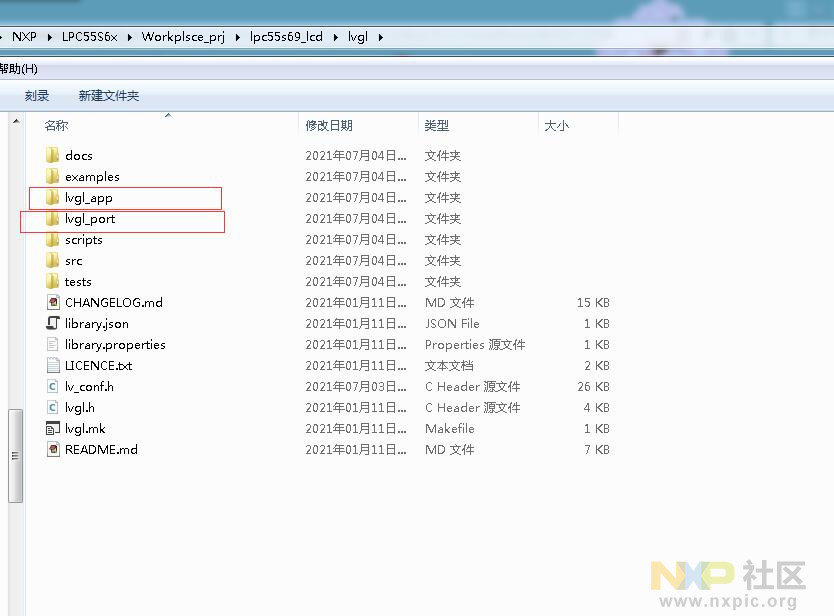
然后在lvgl目录下新建lvgl_app和lvgl_port这2个文件夹,lvgl_app主要放设计的应用文件,lvgl_port主要放需要移植的文件。
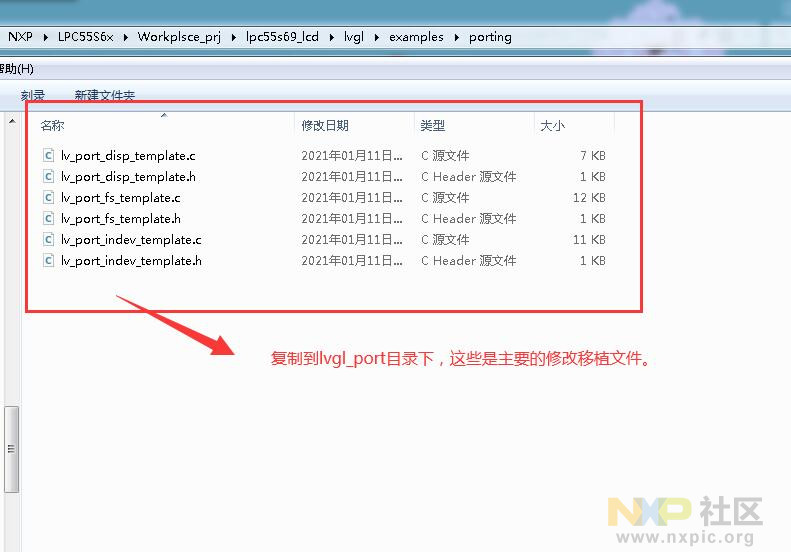
如下图,将lvgl的example/port目录下移植文件复制到lvgl_port目录下。
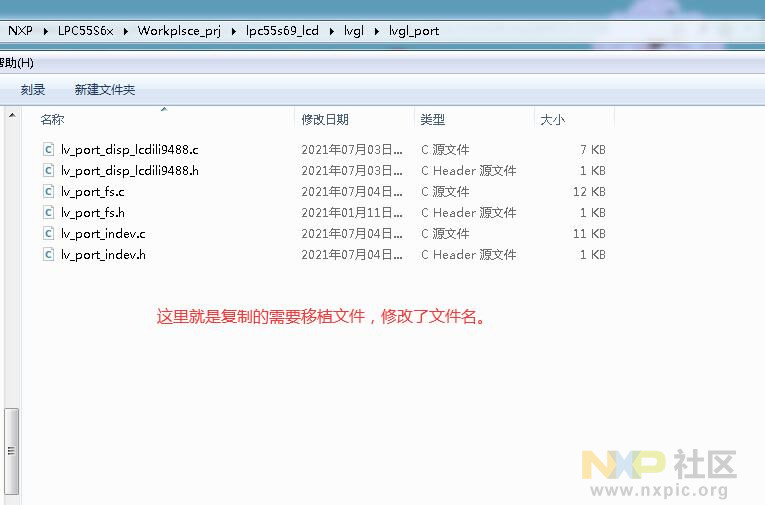
参考网上移植方法修改lcd对接lvgl的驱动显示接口文件lv_port_disp_xxxl.c。
void lv_port_disp_init(void)
{
/*-------------------------
* Initialize your display
* -----------------------*/
disp_init();
/*-----------------------------
* Create a buffer for drawing
*----------------------------*/
/* LVGL requires a buffer where it draws the objects. The buffer's has to be greater than 1 display row
*
* There are three buffering configurations:
* 1. Create ONE buffer with some rows:
* LVGL will draw the display's content here and writes it to your display
*
* 2. Create TWO buffer with some rows:
* LVGL will draw the display's content to a buffer and writes it your display.
* You should use DMA to write the buffer's content to the display.
* It will enable LVGL to draw the next part of the screen to the other buffer while
* the data is being sent form the first buffer. It makes rendering and flushing parallel.
*
* 3. Create TWO screen-sized buffer:
* Similar to 2) but the buffer have to be screen sized. When LVGL is ready it will give the
* whole frame to display. This way you only need to change the frame buffer's address instead of
* copying the pixels.
* */
/* Example for 1) */
static lv_disp_buf_t disp_buf_1;
static lv_color_t buf1_1[LV_HOR_RES_MAX * 10]; /*A buffer for 10 rows*/
lv_disp_buf_init(&disp_buf_1, buf1_1, NULL, LV_HOR_RES_MAX * 10); /*Initialize the display buffer*/
// /* Example for 2) */
// static lv_disp_buf_t disp_buf_2;
// static lv_color_t buf2_1[LV_HOR_RES_MAX * 10]; /*A buffer for 10 rows*/
// static lv_color_t buf2_2[LV_HOR_RES_MAX * 10]; /*An other buffer for 10 rows*/
// lv_disp_buf_init(&disp_buf_2, buf2_1, buf2_2, LV_HOR_RES_MAX * 10); /*Initialize the display buffer*/
// /* Example for 3) */
// static lv_disp_buf_t disp_buf_3;
// static lv_color_t buf3_1[LV_HOR_RES_MAX * LV_VER_RES_MAX]; /*A screen sized buffer*/
// static lv_color_t buf3_2[LV_HOR_RES_MAX * LV_VER_RES_MAX]; /*An other screen sized buffer*/
// lv_disp_buf_init(&disp_buf_3, buf3_1, buf3_2, LV_HOR_RES_MAX * LV_VER_RES_MAX); /*Initialize the display buffer*/
/*-----------------------------------
* Register the display in LVGL
*----------------------------------*/
lv_disp_drv_t disp_drv; /*Descriptor of a display driver*/
lv_disp_drv_init(&disp_drv); /*Basic initialization*/
/*Set up the functions to access to your display*/
/*Set the resolution of the display*/
disp_drv.hor_res = LV_HOR_RES_MAX;
disp_drv.ver_res = LV_VER_RES_MAX;
/*Used to copy the buffer's content to the display*/
disp_drv.flush_cb = disp_flush;
/*Set a display buffer*/
disp_drv.buffer = &disp_buf_1;
#if LV_USE_GPU
/*Optionally add functions to access the GPU. (Only in buffered mode, LV_VDB_SIZE != 0)*/
/*Blend two color array using opacity*/
disp_drv.gpu_blend_cb = gpu_blend;
/*Fill a memory array with a color*/
disp_drv.gpu_fill_cb = gpu_fill;
#endif
/*Finally register the driver*/
lv_disp_drv_register(&disp_drv);
}
复制代码
static void disp_flush(lv_disp_drv_t * disp_drv, const lv_area_t * area, lv_color_t * color_p)
{
/*The most simple case (but also the slowest) to put all pixels to the screen one-by-one*/
// int32_t x;
// int32_t y;
// for(y = area->y1; y <= area->y2; y++) {
// for(x = area->x1; x <= area->x2; x++) {
// /* Put a pixel to the display. For example: */
// /* put_px(x, y, *color_p)*/
// color_p++;
// }
// }
lcd_fill_buff(area->x1,area->y1,area->x2,area->y2,(uint8_t *)color_p);
/* IMPORTANT!!!
* Inform the graphics library that you are ready with the flushing*/
lv_disp_flush_ready(disp_drv);
}
复制代码
主要是这2个函数内容,暂时不用GPU加速之内。
再就是配置lv_conf.h文件,关于lvgl的一些配置信息。
主函数修改移植如下:主要是定时器SysTick
void SysTick_Handler(void)
{
lv_tick_inc(1);
}
void lv_example_btn_1(void)
{
lv_obj_t * label;
lv_obj_t * btn1 = lv_btn_create(lv_scr_act(),NULL);
lv_obj_align(btn1, NULL, LV_ALIGN_CENTER, 0, -40);
label = lv_label_create(btn1,NULL);
lv_label_set_text(label, "Button");
lv_obj_t * btn2 = lv_btn_create(lv_scr_act(), NULL);
lv_obj_align(btn2,NULL, LV_ALIGN_CENTER, 0, 40);
label = lv_label_create(btn2,NULL);
lv_label_set_text(label, "Toggle");
}
/*******************************************************************************
* Code
******************************************************************************/
/*!
* @brief Main function
*/
int main(void)
{
char ch;
int i;
/* Init board hardware. */
/* set BOD VBAT level to 1.65V */
POWER_SetBodVbatLevel(kPOWER_BodVbatLevel1650mv, kPOWER_BodHystLevel50mv, false);
/* attach main clock divide to FLEXCOMM0 (debug console) */
CLOCK_AttachClk(BOARD_DEBUG_UART_CLK_ATTACH);
BOARD_InitPins();
BOARD_InitBootClocks();
BOARD_InitDebugConsole();
init_cycle_counter(false);
PRINTF("hello world.rn");
lcd_init();
lcd_clear(0xf800);
lv_init();
extern void lv_port_disp_init(void);
lv_port_disp_init();
lv_example_btn_1();
while (1)
{
lv_task_handler();
}
}
复制代码
现在基本完成了移植,然后准备编译下载看看效果。这里要特别注意:需要配置堆栈大小。我就是在这里遇到坑了。按上面移植之后一直显示不正常,而且程序跑飞了。
后面参考网上移植的说要配置堆栈至少0x800大小,然后我就去找堆栈配置看看。在这里一般堆栈是在汇编*.s文件中,结果发现汇编文件中没有堆栈配置,最后找到KEIL的配置下修改了堆栈大小。
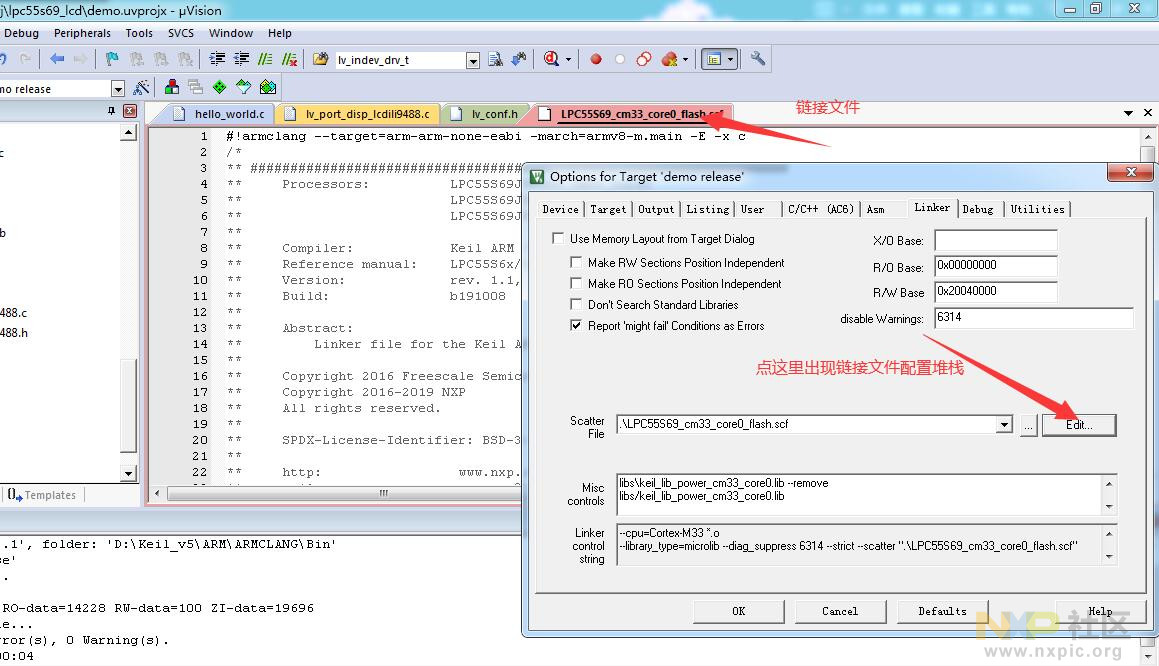
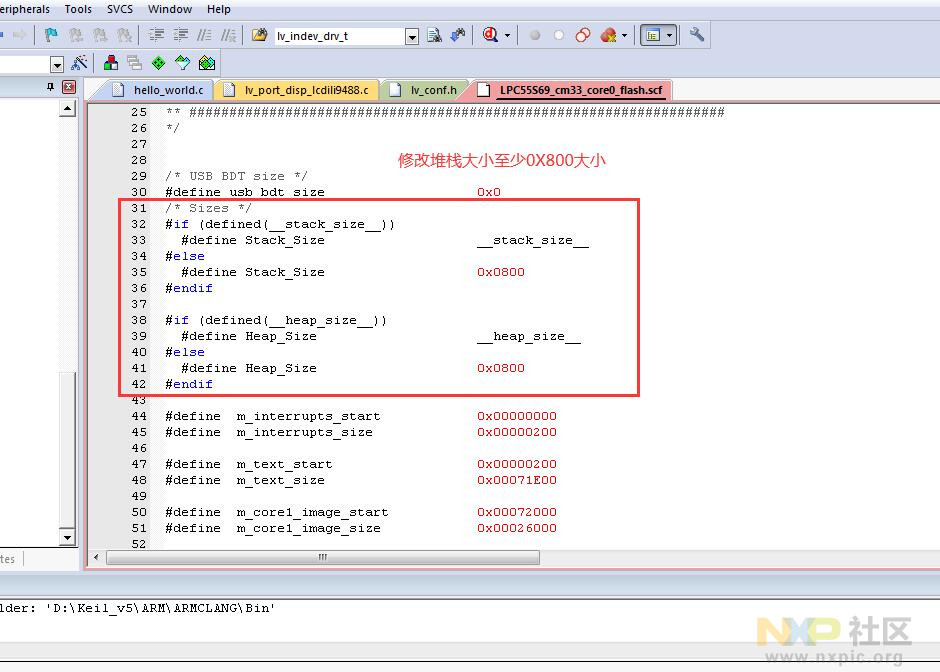
最后重新编译下载,终于成功显示。
效果如下

移植过程写的比较简单,具体参考如下代码:lpc55s69_lcd.rar (7.21 MB, 点击下方附件下载)


 2583
2583


