|
|
本帖最后由 0oo0o0 于 2018-2-7 13:40 编辑
0.序言

本实验在我的RaspberryPi 3b 上完成, Python3 。
我这个思路也算是骨骼清奇了,套了一圈用探针抓服务器信息。
不过对于一个本身运行着PHP的建站服务器,多挂一个探针并没有什么损耗。
我的ipv6代理服务器很受欢迎,因此按需求来讲,我需要一个能实时监控流量的工具。PHP探针作为一个很方便的工具,成为了我的选择。但是自带的web界面对我来说不是很方便。
某天我在床上躺尸的时候突然想到,大家天天剁手买VPS以针会友。如果我直接用树莓派抓取探针返回的服务器状态,显示在1602上,从此开始日日夜夜躺在沙发上看着数据跳动,岂不美哉?
玩了一假期的树莓派,之前做项目剩了很多1602屏幕。它们之间的组合,就有了今天的作品。
1.雅黑PHP探针
1.1 关于PHP探针
关于PHP探针,给不知道的读者说道说道。
雅黑实验室
【雅黑PHP探针】
雅黑PHP探针最大的优点:每秒更新,不用刷网页。有一个负责的站长,会对探针进行长期支持和更新。
用于Linux系统(不推荐使用于Windows系统)。
可以实时查看服务器硬盘资源、内存占用、网卡流量、系统负载、服务器时间等信息,1秒钟刷新一次。
以及包括服务器IP地址,Web服务器环境监测,php等信息。
php探针对于经常购买VPS折腾的人肯定不陌生,简单地老说就是一个可以获取系统信息并在网页上显示的php程序。雅黑PHP探针的界面如下:
我一个Digitalocean服务器上挂的演示探针:http://tyo01.misaka.cc:10086/tz.php

因此,经常有人买各种廉价小内存的VPS,只能挂个探针,却因此获得巨大快感,并从bbs上交流。叫做以针会友。
1.2 分析
打开探针网页可以看到循环刷新的服务器信息。思路很简单,用简单的Python爬虫去爬这个网页。
首先打开探针网页分析一下。
演示:
http://tyo01.misaka.cc:10086/tz.php
可以看到服务器实时数据表格,是动态刷新的。因此,直接爬取该网页的html并不能持续获取服务器信息。既然有动态刷新,想必服务器和客户端之间必有数据包传输。在Chrome中,按F12开始审查网页,进入Networking标签栏。

可以立刻找到动态刷新请求的url。该url是
http://tyo01.misaka.cc:10086/tz.php?act=rt&callback=jQuery1705809678890101435_1487402170358&_=1487402269387
直接访问该url,返回的是以下数据。- jQuery1705809678890101435_1487402170358({"useSpace":"3.985","freeSpace":"15.577","hdPercent":"20.37","barhdPercent":"20.37%","TotalMemory":"490.23 M","UsedMemory":"414.12 M","FreeMemory":"76.11 M","CachedMemory":"84.05 M","Buffers":"104.9 M","TotalSwap":"0 M","swapUsed":"0 M","swapFree":"0 M","loadAvg":"0.00 0.00 0.00 1\/117","uptime":"3\u59293\u5c0f\u65f626\u5206\u949f","freetime":"","bjtime":"","stime":"2017-02-18 15:17:56","memRealPercent":"45.93","memRealUsed":"225.17 M","memRealFree":"265.06 M","memPercent":"84.47%","memCachedPercent":"17.15","barmemCachedPercent":"17.15%","swapPercent":"0","barmemRealPercent":"45.93%","barswapPercent":"0%","NetOut2":"44 K 505 B ","NetOut3":"2 G 825 M 602 K 970 B ","NetOut4":"","NetOut5":"","NetOut6":"","NetOut7":"","NetOut8":"","NetOut9":"","NetOut10":"","NetInput2":"44 K 505 B ","NetInput3":"3 G 145 M 314 K 713 B ","NetInput4":"","NetInput5":"","NetInput6":"","NetInput7":"","NetInput8":"","NetInput9":"","NetInput10":"","NetOutSpeed2":"45561","NetOutSpeed3":"3013176266","NetOutSpeed4":"0","NetOutSpeed5":"","NetInputSpeed2":"45561","NetInputSpeed3":"3373591241","NetInputSpeed4":"0","NetInputSpeed5":""})
有没有感觉,在其后的数据有着一种很规范的标记方法?是的,在中括号之间,是一种json数据集。
JSON是一种取代XML的数据结构,和xml相比,它更小巧但描述能力却不差,由于它的小巧所以网络传输数据将减少更多流量从而加快速度。
可以将其理解成一组各类语言都可以接受的,有自己的标准的,用于互相交换信息的数据。
url中的参数 act=rt ,在雅黑PHP探针源码中ctrl+F一下其源代码。
立刻找到,在tz.php中第964行:- //ajax调用实时刷新
- if ($_GET['act'] == "rt")
- {
- $arr=array('useSpace'=>"$du",'freeSpace'=>"$df",'hdPercent'=>"$hdPercent",'barhdPercent'=>"$hdPercent%",'TotalMemory'=>"$mt",'UsedMemory'=>"$mu",'FreeMemory'=>"$mf",'CachedMemory'=>"$mc",'Buffers'=>"$mb",'TotalSwap'=>"$st",'swapUsed'=>"$su",'swapFree'=>"$sf",'loadAvg'=>"$load",'uptime'=>"$uptime",'freetime'=>"$freetime",'bjtime'=>"$bjtime",'stime'=>"$stime",'memRealPercent'=>"$memRealPercent",'memRealUsed'=>"$memRealUsed",'memRealFree'=>"$memRealFree",'memPercent'=>"$memPercent%",'memCachedPercent'=>"$memCachedPercent",'barmemCachedPercent'=>"$memCachedPercent%",'swapPercent'=>"$swapPercent",'barmemRealPercent'=>"$memRealPercent%",'barswapPercent'=>"$swapPercent%",'NetOut2'=>"$NetOut[2]",'NetOut3'=>"$NetOut[3]",'NetOut4'=>"$NetOut[4]",'NetOut5'=>"$NetOut[5]",'NetOut6'=>"$NetOut[6]",'NetOut7'=>"$NetOut[7]",'NetOut8'=>"$NetOut[8]",'NetOut9'=>"$NetOut[9]",'NetOut10'=>"$NetOut[10]",'NetInput2'=>"$NetInput[2]",'NetInput3'=>"$NetInput[3]",'NetInput4'=>"$NetInput[4]",'NetInput5'=>"$NetInput[5]",'NetInput6'=>"$NetInput[6]",'NetInput7'=>"$NetInput[7]",'NetInput8'=>"$NetInput[8]",'NetInput9'=>"$NetInput[9]",'NetInput10'=>"$NetInput[10]",'NetOutSpeed2'=>"$NetOutSpeed[2]",'NetOutSpeed3'=>"$NetOutSpeed[3]",'NetOutSpeed4'=>"$NetOutSpeed[4]",'NetOutSpeed5'=>"$NetOutSpeed[5]",'NetInputSpeed2'=>"$NetInputSpeed[2]",'NetInputSpeed3'=>"$NetInputSpeed[3]",'NetInputSpeed4'=>"$NetInputSpeed[4]",'NetInputSpeed5'=>"$NetInputSpeed[5]");
- $jarr=json_encode($arr);
- $_GET['callback'] = htmlspecialchars($_GET['callback']);
- echo $_GET['callback'],'(',$jarr,')';
- exit;
- }
得到如下结果:- ({"useSpace":"3.986","freeSpace":"15.576","hdPercent":"20.38","barhdPercent":"20.38%","TotalMemory":"490.23 M","UsedMemory":"414.94 M","FreeMemory":"75.29 M","CachedMemory":"84.82 M","Buffers":"105.35 M","TotalSwap":"0 M","swapUsed":"0 M","swapFree":"0 M","loadAvg":"0.05 0.01 0.00 1\/117","uptime":"3\u59293\u5c0f\u65f644\u5206\u949f","freetime":"","bjtime":"","stime":"2017-02-18 15:35:36","memRealPercent":"45.85","memRealUsed":"224.77 M","memRealFree":"265.46 M","memPercent":"84.64%","memCachedPercent":"17.3","barmemCachedPercent":"17.3%","swapPercent":"0","barmemRealPercent":"45.85%","barswapPercent":"0%","NetOut2":"44 K 505 B ","NetOut3":"2 G 826 M 560 K 68 B ","NetOut4":"","NetOut5":"","NetOut6":"","NetOut7":"","NetOut8":"","NetOut9":"","NetOut10":"","NetInput2":"44 K 505 B ","NetInput3":"3 G 146 M 334 K 784 B ","NetInput4":"","NetInput5":"","NetInput6":"","NetInput7":"","NetInput8":"","NetInput9":"","NetInput10":"","NetOutSpeed2":"45561","NetOutSpeed3":"3014180932","NetOutSpeed4":"0","NetOutSpeed5":"","NetInputSpeed2":"45561","NetInputSpeed3":"3374660368","NetInputSpeed4":"0","NetInputSpeed5":""})
2.Python的简单爬虫
Python爬虫的简易教程我参考了:Python爬虫教程
2.1 服务器返回json
文章简洁精悍。没多少字,简单带过后,了解了爬虫运用的一些思想。
想获得服务器信息的json数据,比较容易。现在shell中验证一下- pi@raspberrypi:~ $ python3
- Python 3.4.2 (default, Oct 19 2014, 13:31:11)
- [GCC 4.9.1] on linux
- Type "help", "copyright", "credits" or "license" for more information.
- >>> from urllib import request
- >>> f = request.urlopen("http://138.197.193.89:10086/tz.php?act=rt")
- >>> print(f)
- "http.client.HTTPResponse object at 0x7656ef70"
- >>> data = f.read()
- >>> print(data.decode('utf-8'))
- ({"useSpace":"3.983","freeSpace":"15.579","hdPercent":"20.36","barhdPercent":"20.36%","T 0.00 0.00 1\/119","uptime":"3\u59290\u5c0f\u65f616\u5206\u949f","freetime":"","bjtime":.49%","swapPercent":"0","barmemRealPercent":"51.14%","barswapPercent":"0%","NetOut2":"4437 M 409 K 258 B ","NetInput4":"","NetInput5":"","NetInput6":"","NetInput7":"","NetInputetInputSpeed4":"0","NetInputSpeed5":""})
此时data的类型为“bytes”。用str()转换:
- >>> type(data)
- "class 'bytes'"
- >>> data2 = str(data.decode('utf-8')).strip('(').strip(')')
- >>> print(data2)
- {"useSpace":"3.983","freeSpace":"15.579","hdPercent":"20.36","barhdPercent":"20.36%","TotalMemory":"490.23 M","UsedMemory":"427.5 M","FreeMemory":"62.73 M","CachedMemory":"76.5 M","Buffers":"98.95 M","TotalSwap":"0 M","swapUsed":"0 M","swapFree":"0 M","loadAvg":"0.00 0.00 0.00 1\/121","uptime":"3\u59290\u5c0f\u65f624\u5206\u949f","freetime":"","bjtime":"","stime":"2017-02-18 12:15:45","memRealPercent":"51.41","memRealUsed":"252.05 M","memRealFree":"238.18 M","memPercent":"87.2%","memCachedPercent":"15.6","barmemCachedPercent":"15.6%","swapPercent":"0","barmemRealPercent":"51.41%","barswapPercent":"0%","NetOut2":"44 K 505 B ","NetOut3":"2 G 817 M 1005 K 862 B ","NetOut4":"","NetOut5":"","NetOut6":"","NetOut7":"","NetOut8":"","NetOut9":"","NetOut10":"","NetInput2":"44 K 505 B ","NetInput3":"3 G 137 M 942 K 336 B ","NetInput4":"","NetInput5":"","NetInput6":"","NetInput7":"","NetInput8":"","NetInput9":"","NetInput10":"","NetOutSpeed2":"45561","NetOutSpeed3":"3005200222","NetOutSpeed4":"0","NetOutSpeed5":"","NetInputSpeed2":"45561","NetInputSpeed3":"3365845328","NetInputSpeed4":"0","NetInputSpeed5":""}
- >>> json.loads(data2)
- {'hdPercent': '20.36', 'NetInput9': '', 'swapFree': '0 M', 'NetOutSpeed5': '', 'UsedMemory': '427.5 M', 'NetOut10': '', 'NetInput4': '', 'NetInputSpeed5': '', 'FreeMemory': '62.73 M', 'NetInputSpeed4': '0', 'NetOut7': '', 'TotalSwap': '0 M', 'NetOut2': '44 K 505 B ', 'NetOut5': '', 'NetOut8': '', 'NetInput5': '', 'NetOut4': '', 'NetInputSpeed2': '45561', 'memCachedPercent': '15.6', 'NetInputSpeed3': '3365845328', 'loadAvg': '0.00 0.00 0.00 1/121', 'TotalMemory': '490.23 M', 'barmemRealPercent': '51.41%', 'NetOut6': '', 'NetInput7': '', 'barswapPercent': '0%', 'NetOutSpeed2': '45561', 'barhdPercent': '20.36%', 'stime': '2017-02-18 12:15:45', 'useSpace': '3.983', 'bjtime': '', 'barmemCachedPercent': '15.6%', 'memRealFree': '238.18 M', 'NetInput3': '3 G 137 M 942 K 336 B ', 'NetInput6': '', 'uptime': '3天0小时24分钟', 'NetOutSpeed4': '0', 'NetInput2': '44 K 505 B ', 'freetime': '', 'NetOut3': '2 G 817 M 1005 K 862 B ', 'NetInput10': '', 'memRealUsed': '252.05 M', 'Buffers': '98.95 M', 'freeSpace': '15.579', 'memPercent': '87.2%', 'NetOutSpeed3': '3005200222', 'swapUsed': '0 M', 'CachedMemory': '76.5 M', 'NetOut9': '', 'swapPercent': '0', 'memRealPercent': '51.41', 'NetInput8': ''}
- >>> data3=json.loads(data2)
- >>> type(data3)
- "class 'dict'"
- >>> type(data3['CachedMemory'])
- "class 'str'"
2.2 笨拙地封装
用我笨拙的手法尝试封装一下~- # -*- coding:utf-8 -*-
- from urllib import request
- import json
- #探针爬虫类
- class PHPTZ:
- #初始化方法,定义一些变量
- def __init__(self):
- self.url = 'http://138.197.193.89:888/tz.php?act=rt'
- def getData(self):
- try:
- f = request.urlopen(self.url)
- data = f.read()
- data2 = str(data.decode('utf-8')).strip('(').strip(')')
- dataj = json.loads(data2)
- print(dataj)
- print(type(dataj))
- except
- print('Error')
- return None
- myserver = PHPTZ()
- myserver.getData()
- pi@raspberrypi:~ $ sudo python3 tz.py
- {'NetInput7': '', 'NetInput5': '', 'NetOut2': '44 K 505 B ', 'uptime': '3天4小时48分钟', 'loadAvg': '0.00 0.00 0.00 1/115', 'NetInput10': '', 'stime': '2017-02-18 16:39:49', 'NetInput4': '', 'NetOutSpeed2': '45561', 'NetInputSpeed3': '3379146879', 'freetime': '', 'NetOut9': '', 'UsedMemory': '418.66 M', 'hdPercent': '20.39', 'swapFree': '0 M', 'NetOut7': '', 'CachedMemory': '87.81 M', 'NetInput3': '3 G 150 M 620 K 127 B ', 'NetOut3': '2 G 830 M 296 K 887 B ', 'NetInputSpeed4': '0', 'NetOut6': '', 'NetInput2': '44 K 505 B ', 'memRealPercent': '45.61', 'FreeMemory': '71.57 M', 'NetInput8': '', 'NetOut8': '', 'memRealFree': '266.66 M', 'freeSpace': '15.573', 'swapPercent': '0', 'barmemRealPercent': '45.61%', 'memCachedPercent': '17.91', 'TotalMemory': '490.23 M', 'NetInputSpeed2': '45561', 'barmemCachedPercent': '17.91%', 'NetInputSpeed5': '', 'TotalSwap': '0 M', 'NetOut4': '', 'barhdPercent': '20.39%', 'Buffers': '107.28 M', 'useSpace': '3.989', 'memPercent': '85.4%', 'bjtime': '', 'NetOutSpeed4': '0', 'NetInput6': '', 'memRealUsed': '223.57 M', 'barswapPercent': '0%', 'swapUsed': '0 M', 'NetOut5': '', 'NetInput9': '', 'NetOutSpeed5': '', 'NetOutSpeed3': '3018105719', 'NetOut10': ''}
- <class 'dict'>
这里注意一下。字典中”speed”的值为一累计数,在后来的数据处理用,需要算出差值,在本机估算网速。
3.使用1602液晶屏
3.1 1602及接口定义

16是指一行显示16个字符,02表示2行。1602是一种非常常见的、在DIY和工业中广泛使用的显示期间。价格低,可以选用各种颜色的背光,字符颜色也是可选的。
这里不是i2c接口的1602显示屏。
1602的引脚定义如下:
VSS,接地
VDD,接5V电源
VO,液晶对比度调节,接电位器中间的引脚
RS,寄存器选择
RW,读写选择
EN,使能信号
D0,数据位0,4位工作模式下不用,不接
D1,数据位1,4位工作模式下不用,不接
D2,数据位2,4位工作模式下不用,不接
D3,数据位3,4位工作模式下不用,不接
D4,数据位4
D5,数据位5
D6,数据位6
D7,数据位7
A,液晶屏背光+,接5V
K,液晶屏背光-,接地
3.2 Raspberry Pi 3B 的引脚定义

该图是型号3b的引脚定义图。之前也是图不对被坑了好久。注意在以下Python代码中,接口号码指的是“GPIO”代号。
3.3 Adafruit的charLCD库
Adafruit系列的库是我比较喜欢的库,好用,简洁易懂!
https://github.com/adafruit/Adafruit_Python_CharLCD
下载后在树莓派上安装时,注意:
需要注意python命令默认代表的Python版本号。我的树莓派,“python”这条命令默认指的是Python2。因此,我需要运行
sudo python3 setup.py install
3.4 点亮1602和运行示例代码
来看一下charLCD库的示例代码:- #!/usr/bin/python
- # Example using a character LCD connected to a Raspberry Pi or BeagleBone Black.
- import time
- import Adafruit_CharLCD as LCD
- # Raspberry Pi pin configuration:
- lcd_rs = 27 # Note this might need to be changed to 21 for older revision Pi's.
- lcd_en = 22
- lcd_d4 = 25
- lcd_d5 = 24
- lcd_d6 = 23
- lcd_d7 = 18
- lcd_backlight = 4
- # BeagleBone Black configuration:
- # lcd_rs = 'P8_8'
- # lcd_en = 'P8_10'
- # lcd_d4 = 'P8_18'
- # lcd_d5 = 'P8_16'
- # lcd_d6 = 'P8_14'
- # lcd_d7 = 'P8_12'
- # lcd_backlight = 'P8_7'
- # Define LCD column and row size for 16x2 LCD.
- lcd_columns = 16
- lcd_rows = 2
- # Alternatively specify a 20x4 LCD.
- # lcd_columns = 20
- # lcd_rows = 4
- # Initialize the LCD using the pins above.
- lcd = LCD.Adafruit_CharLCD(lcd_rs, lcd_en, lcd_d4, lcd_d5, lcd_d6, lcd_d7,
- lcd_columns, lcd_rows, lcd_backlight)
- # Print a two line message
- lcd.message('Hello\nworld!')
- # Wait 5 seconds
- time.sleep(5.0)
- # Demo showing the cursor.
- lcd.clear()
- lcd.show_cursor(True)
- lcd.message('Show cursor')
- time.sleep(5.0)
- # Demo showing the blinking cursor.
- lcd.clear()
- lcd.blink(True)
- lcd.message('Blink cursor')
- time.sleep(5.0)
- # Stop blinking and showing cursor.
- lcd.show_cursor(False)
- lcd.blink(False)
- # Demo scrolling message right/left.
- lcd.clear()
- message = 'Scroll'
- lcd.message(message)
- for i in range(lcd_columns-len(message)):
- time.sleep(0.5)
- lcd.move_right()
- for i in range(lcd_columns-len(message)):
- time.sleep(0.5)
- lcd.move_left()
- # Demo turning backlight off and on.
- lcd.clear()
- lcd.message('Flash backlight\nin 5 seconds...')
- time.sleep(5.0)
- # Turn backlight off.
- lcd.set_backlight(0)
- time.sleep(2.0)
- # Change message.
- lcd.clear()
- lcd.message('Goodbye!')
- # Turn backlight on.
- lcd.set_backlight(1)
已经很清楚了,主要是注意,数字代表GPIO接口。
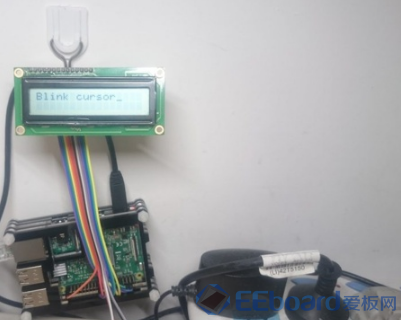
ok,我找到正确的GPIO参照图后,成功点亮。

4.最终组合
先贴出来完整代码- from urllib import request
- import json
- import time
- import Adafruit_CharLCD as LCD
- import math
- class PHPTZ:
- def __init__(self):
- self.url = 'http://150.95.151.229:8888/tz.php?act=rt'
- self.dataj = []
- def getData(self):
- try:
- f = request.urlopen(self.url)
- data = f.read()
- data2 = str(data.decode('utf-8')).strip('(').strip(')')
- self.dataj = json.loads(data2)
- return self.dataj
- except :
- print('Error')
- return None
- def getSpeed(self):
- return self.dataj['NetOutSpeed3']
- class my1602:
- def __init__(self,a):
- self.lcd_rs = 27
- self.lcd_en = 22
- self.lcd_d4 = 25
- self.lcd_d5 = 24
- self.lcd_d6 = 23
- self.lcd_d7 = 18
- self.lcd_backlight = 4
- self.lcd_columns = 16
- self.lcd_rows = 2
- self.lcd = LCD.Adafruit_CharLCD(self.lcd_rs, self.lcd_en, self.lcd_d4, self.lcd_d5, self.lcd_d6, self.lcd_d7,self.lcd_columns, self.lcd_rows, self.lcd_backlight)
- self.dataj = a
- def display(self,b,d,t):
- self.dataj = b
- self.lcd.clear()
- self.lcd.message(self.dataj['NetOut3']+'\n'+str("%.3f"%(d/1024/t))+' KB/s')
- #主函数开始,前四行类似于setup
- myserver = PHPTZ()
- mylcd = my1602(data)
- time1 = time.time()
- speed2=speed1=myserver.getSpeed()
- #大循环
- while(1):
- data=myserver.getData()
- speed2=speed1
- speed1=myserver.getSpeed()
- time2=time1
- time1=time.time()
- mylcd.display(data,float(speed1)-float(speed2),float(time1)-float(time2))
?myserver.getSpeed()返回值为字符串,需要转化成float。
计算网速,用了两次time.time获取时间戳,然后再相除换算得到具体网速。鉴于本地和服务器延迟基本稳定,此方法比较准确。
"%.3f"%(d/1024/t)保留3位小数
面向对象的设计模式意识浅薄,多多包涵
运行,成功!

5.包装及最终效果
包装见:
残念系手工艺人:手把手教你用湿巾盒DIY树莓派外壳
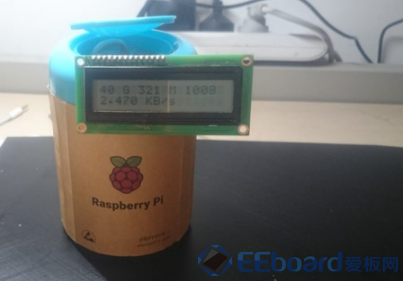
最终效果:

6.结语
假期学了一点点Python,玩了树莓派。在学期初真真正正用树莓派做出了一个符合自己需求的东西。
树莓派真的好玩,我突然发现我对Linux的理解更深了,一些日常操作也不在话下了。
树莓派真好玩儿,您得来一个。
|
|
 /3
/3 
 /3
/3 