本帖最后由 pcduino 于 2013-3-14 18:24 编辑
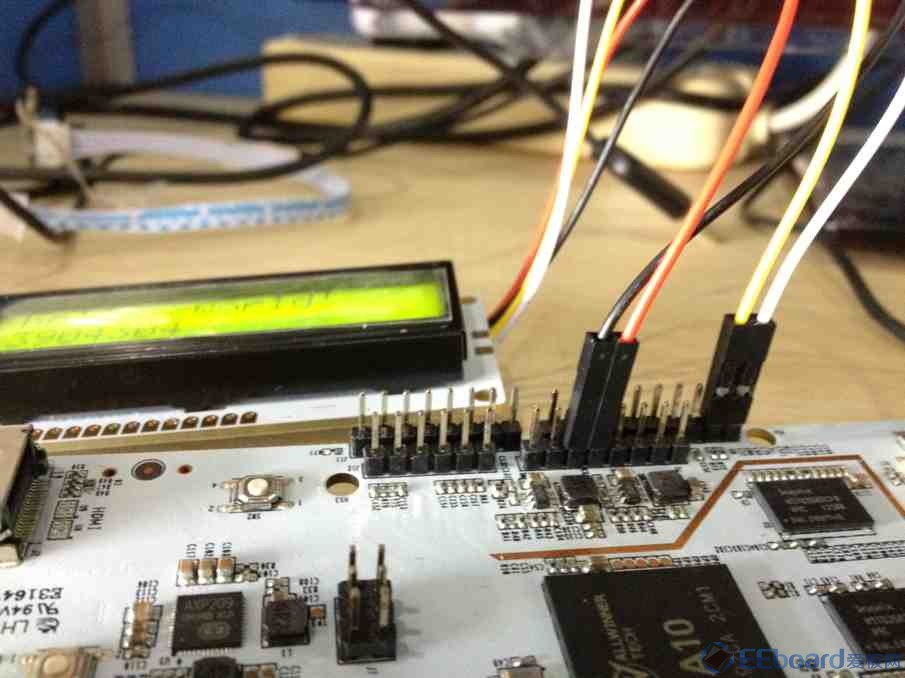
Pcduino上也可以进行I2C通信了,在控制方式简单以及接口线少的情况下轻松实现高速率通信,以下是具体的操作演示步骤: 一、 I2C 的连线方式如图

正面

三、 打开代码,见下图

四、、代码打开成功之后,输入 make进行编译,出现可执行文件,如下图

五、 运行代码,简单快捷的 I2C通信就能在您的Pcduino上实现了

/*
This sketch prints "Hello World!" to the LCD
and shows the time.
The circuit:
* 5V to Arduino 5V pin
* GND to Arduino GND pin
* SCL to Analog #5
* SDA to Analog #4
*/
// include the library code:
#include <core.h>
#include "Wire.h"
#include "LiquidCrystal.h"
// Connect via i2c, default address #0 (A0-A2 not jumpered)
LiquidCrystal lcd(0);
void setup() {
// set up the LCD's number of rows and columns:
lcd.begin(16, 2);
// Print a message to the LCD.
lcd.print("hello, world!");
}
void loop() {
// set the cursor to column 0, line 1
// (note: line 1 is the second row, since counting begins with 0):
lcd.setCursor(0, 1);
// print the number of seconds since reset:
lcd.print(millis()/1000);
lcd.setBacklight(HIGH);
delay(500);
lcd.setBacklight(LOW);
delay(500);
}
|  /3
/3 
 /3
/3 