本帖最后由 懒兔子 于 2015-7-15 20:51 编辑
1.多任务编程 除了计算性能和图形显示以外,树莓派区别于Arduino的一大特点就是运行多任务操作系统。通过多任务系统用户可以同时执行多个互相独立的程序(任务),来完成不同的操作。 利用Python的多任务编程可以方便地实现并行运算,同时充分利用树莓派的多个内核。当然这里面有一些是真的并行操作,还有通过分时轮流使用CPU来实现的“伪并行”。
1.1.多线程编程 多线程操作的特点是简单易用,可用于处理CPU占用率不高的任务。虽然一个进程中可以建立多个线程,但由于同一个Python进程只能目前利用一个CPU内核,因此只能利用树莓派25%的CPU资源。这里例举两种多线程模块和threading。thread模块是比较底层的模块,threading模块对thread做了一些包装,以方便调用。需要注意的是Python3.x中已经不再支持thread模块,请使用threading实现多线程操作。 thread模块编程示例: - import thread
- import time
-
- def thread1():
- while True:
- print("\nThis is thread1!")
- time.sleep(1)
-
-
- def thread2():
- while True:
- print("\nThis is thread2!")
- time.sleep(2)
-
- thread.start_new_thread(thread1, ())
- thread.start_new_thread(thread2, ())
-
- while True:
- print("\nThis is the main thread!")
- time.sleep(4)
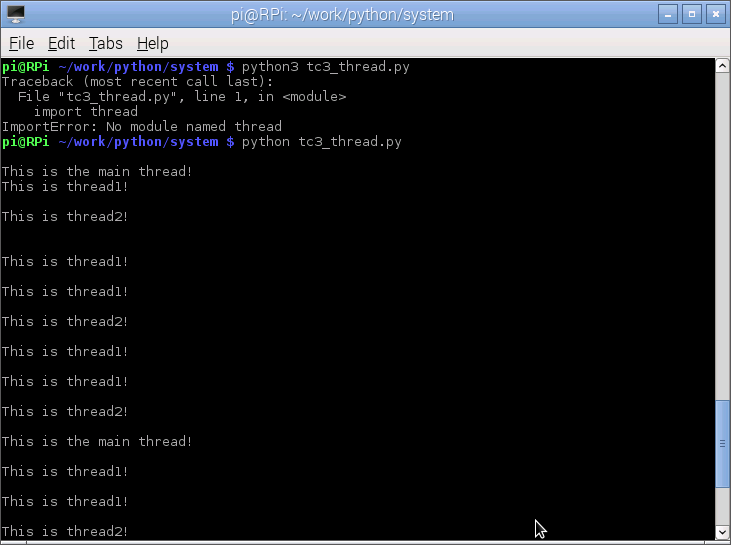
运行效果
threading模块编程示例: - import threading
- import time
-
- def my_thread():
- for i in range(0, 4):
- print("\nThis is a sub thread!")
- time.sleep(1)
-
- thread1 = threading.Thread(target = my_thread, args = ())
- thread2 = threading.Thread(target = my_thread, args = ())
- thread1.start()
- thread2.start()
- thread1.join()
- thread2.join()
-
- print("\nThis is the main thread!")
代码中的start()函数用于启动线程,join()用于等待线程结束。 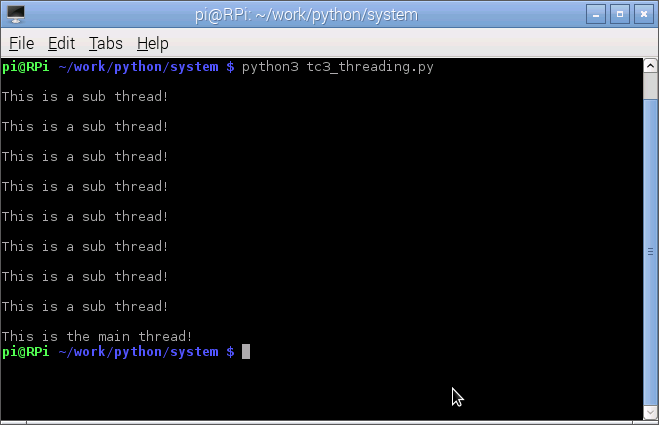
运行效果
另外thread模块还有一种timer方式,可以延时一段时间再启动线程,代码示例如下: - import threading
- import time
-
- def thread_timer():
- print("\nThis is a timer thread!")
-
- thread_tm = threading.Timer(3, thread_timer)
- thread_tm.start()
-
- for i in range(0, 5):
- print("\nThis is the main thread!")
- time.sleep(1)
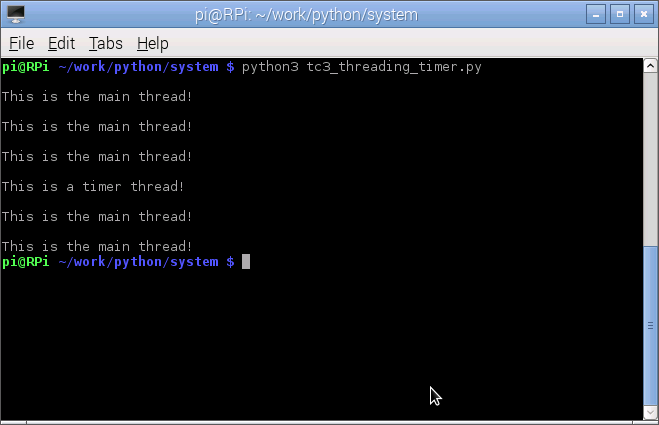
运行效果
1.2.Fork进程操作 我们在上一节中提到了,python的多线程操作只能利用一个CPU内核的资源。如果想要使用树莓派2的全部资源,方法之一就是使用fork创建多个进程。下面的代码演示了简单的fork操作。 - import os, time
-
- pid = os.fork()
-
- # New created child process, fork() returns 0
- if pid == 0:
- print("I'm the child process, PID = %d" % os.getpid())
- time.sleep(5)
- exit(0)
-
- # Parent process, fork() returns PID of created child
- else:
- child_pid = pid
- print("I'm the parent process, PID = %d\n--> My new created child is %d" % (os.getpid(), child_pid))
- time.sleep(1)
-
- print("Waiting for the child...")
- os.waitpid(child_pid, 0)
- print("Child has finished!")
与thread和threading不同的是,在这里os.fork()的作用是克隆出一个子进程,也就是不管新建的进程还是原有的进程,都会执行fork后面相同的代码。通过对os.fork()的 返回值即可判断该进程为新建立的子进程(返回0)还是原有的父进程(返回子进程的PID)。 os.waitpid()则用来等待子进程结束,和thread中的jion()类似。 
图 运行效果
进程间通信不想线程那样简单,可以使用全局变量。想要在不同的进程间传输信息,就需要使用特有的机制。下面的例子介绍了通过os.pipe()实现两个进程之间通信的方法: - import os, time
-
- # Create pipes for data transmitting
- (r, w) = os.pipe()
- (r, w) = os.fdopen(r, 'r'), os.fdopen(w, 'w')
-
- pid = os.fork()
-
- # New created child process, fork() returns 0
- if pid == 0:
- r.close()
- for i in range(10):
- print("[Child] Sending msg<%d> to parent..." % i)
- w.write("Hello<%d>!\n" % i)
- w.flush()
- time.sleep(1)
-
-
- # Parent process, fork() returns PID of created child
- else:
- w.close()
- while True:
- msg = r.readline()
- if not msg: break
- print("[Parent] Msg from child[PID%d]: %s" %(pid, msg))
示例代码中建立了r、w两个通道,并通过w.write()和r.readline()来进行写入和读取操作。同样的使用fork建立子进程,在子进程中写入字符串信息而不需要读取,因此关闭r通道只保留w通道;在父进程中只用读取子进程发来的信息,因此关闭w通道。
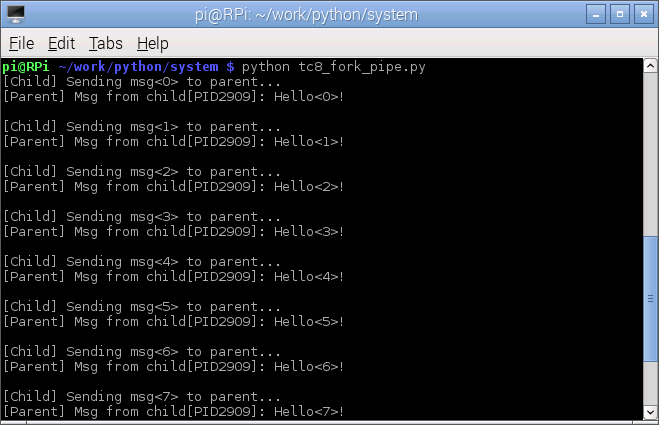
图 运行效果
1.3.Multiprocessing模块 对于初学者来说,在使用fork建立多个子进程时可能不容易理清代码关系。除了os.fork()功能以外,Python中还拥有专用于多任务处理的multiprocessing模块。在下面代码中可以看出,multiprocessing在建立process时和前面的threading模块中建立线程的方式类似。 - import multiprocessing as mp
- import time, os
-
- def my_process(num):
- print("I'm process no.%d, PID = %d." %(num, os.getpid()))
- time.sleep(3)
-
- print("Creating new processes...")
- p1 = mp.Process(target=my_process, args=(1,))
- p2 = mp.Process(target=my_process, args=(2,))
- p3 = mp.Process(target=my_process, args=(3,))
-
- p1.start()
- p2.start()
- p3.start()
-
- print("Waiting for all the processes...")
- p1.join()
- p2.join()
- p3.join()
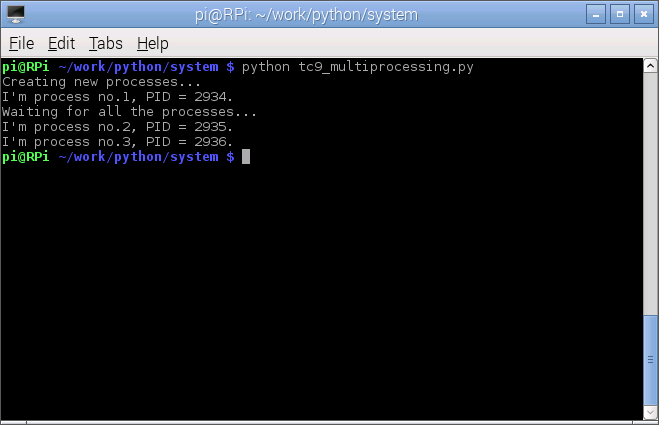
图 运行效果
multiprocessing中也集成了pipe功能,用于进程间的通信。同时我们还可以使用队列(queue)来实现不同进程的数据传输。下面代码建立了reader_p子进程用来读取queue中的数据,并在父进程中向queue中写入数据。与pipe不同,代码中的两个进程共享同一个queue。而写入和读取数据的函数也变成了put()和get()。 - import multiprocessing as mp
- import time
-
- # Read msg from the queue and print it out
- def reader(queue):
- while True:
- msg = queue.get()
- if (msg == 'DONE'):
- break
- print("[Reader]Get msg from writer: %s" % msg)
-
- # Write msg with number into the queue
- def writer(queue):
- print("[Writer] Sending msg to reader...")
- for i in range(0, 5):
- queue.put("Hello <%d>!" % i)
- time.sleep(1)
- queue.put('DONE')
-
- queue = mp.Queue()
-
- print("Create new process as reader!")
- reader_p = mp.Process(target=reader, args=((queue),))
- reader_p.daemon = True
- reader_p.start()
-
- writer(queue)
- reader_p.join()
程序运行后,reader_p进程开始监控队列中的数据,知道接收到字符串“DONE”后退出。父进程向队列中发送一组数据,最后等待子进程结束后退出。 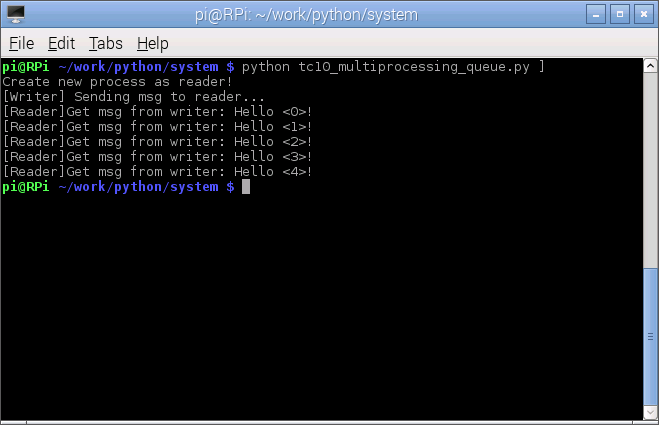
图 运行效果
|  /3
/3 
 /3
/3 