TA的每日心情 | 开心
2024-8-5 17:13 |
|---|
签到天数: 333 天 连续签到: 1 天 [LV.8]以坛为家I
|
本帖最后由 xiaoshen-372360 于 2023-9-13 11:48 编辑
前段时间就拿到板子了,但是没有时间测试,今天抽个时间来测试一下这个板子,判断一个芯片的好坏的话最好的办法当时跑个分试试了,通过**可以知道该芯片的性能处于那个梯队的,好了,我就来说一下。
首先还是板子的介绍吧,先说说开发板的事情,然后我们在做移植。
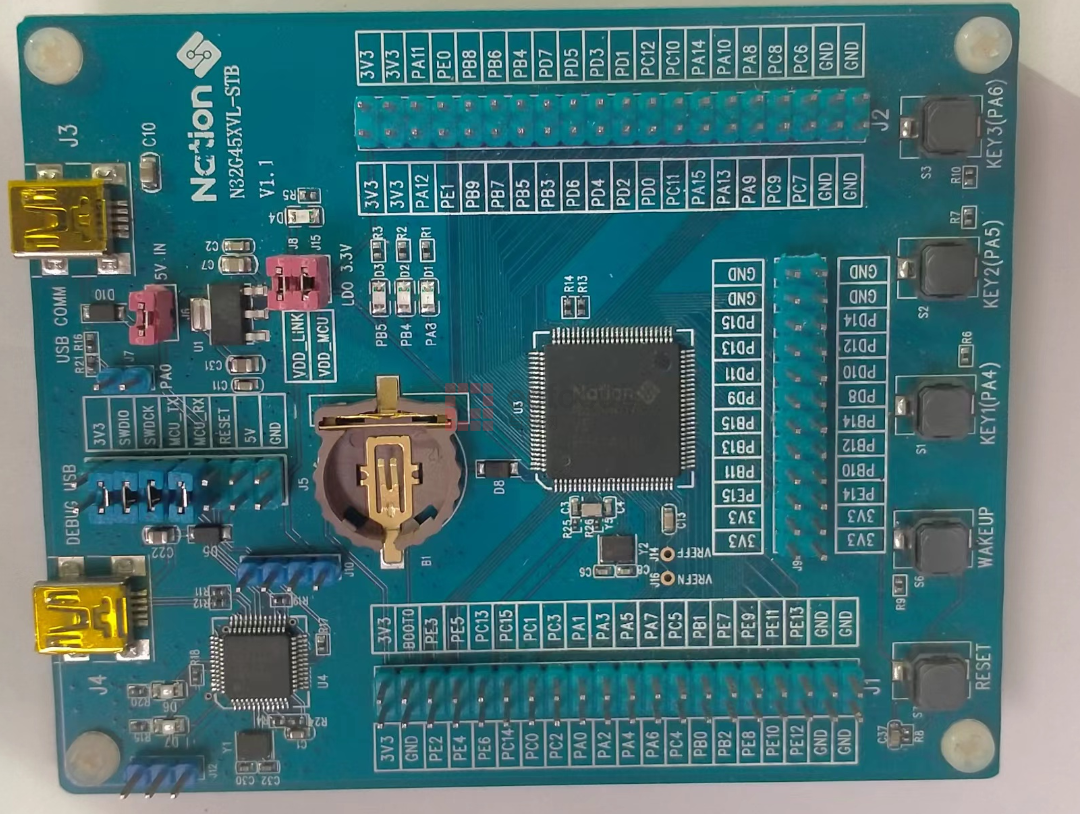
板子芯片的主控是N32G457,N32G457是采用Crotex-M4 的内核频率可以到144M,还带有加密Flash,以及加密Flash算法引擎。带有512M的Flash和144K的SRAM,基本满足绝大多数的开发应用。
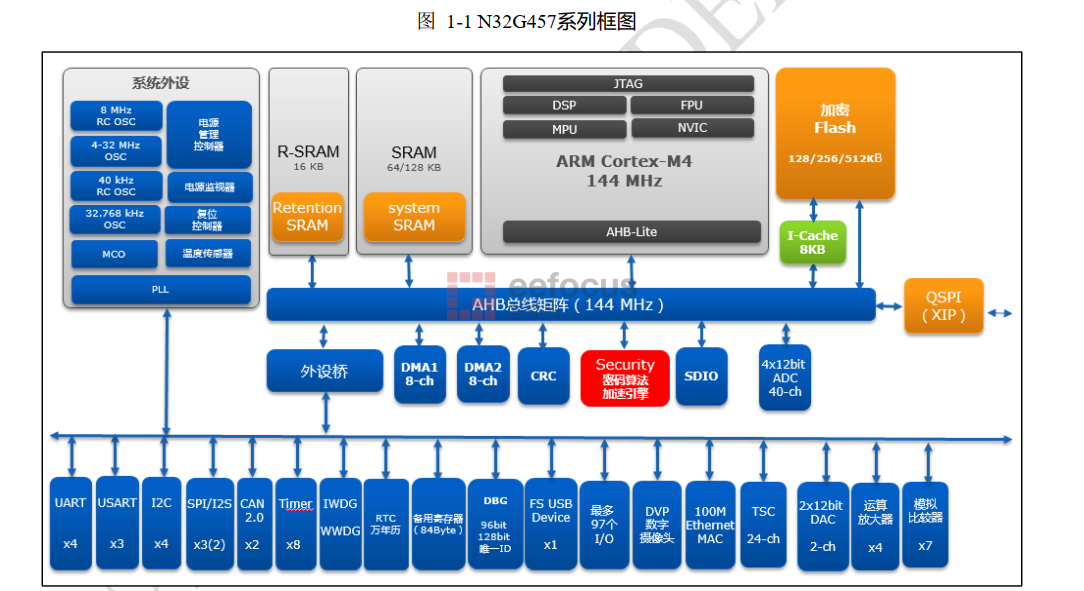
完成了芯片的介绍,我们就开始安装芯片支持包
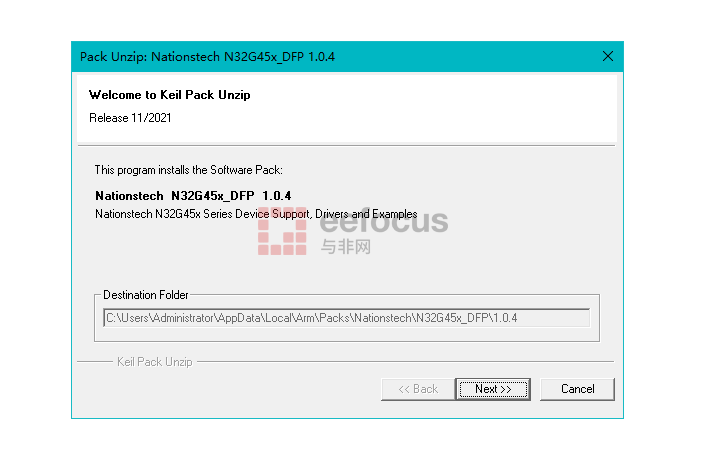
然后就按照自己的习惯新建工程。
首先点个灯看看。
- #include "n32g45x.h"
- void Delay(uint32_t count)
- {
- int j=0;
- for (; count > 0; count--)
- for(j=14400;j>0;j--);
- }
- void LED_Init(void)
- {
- GPIO_InitType GPIO_InitStructure;
- RCC_EnableAPB2PeriphClk(RCC_APB2_PERIPH_GPIOA, ENABLE);
- GPIO_InitStructure.Pin = GPIO_PIN_8;
- GPIO_InitStructure.GPIO_Mode = GPIO_Mode_Out_PP;
- GPIO_InitStructure.GPIO_Speed = GPIO_Speed_50MHz;
- GPIO_InitPeripheral(GPIOA, &GPIO_InitStructure);
- }
- void led_Test(void)
- {
- GPIO_SetBits(GPIOA,GPIO_PIN_8);
- Delay(500);
- GPIO_ResetBits(GPIOA,GPIO_PIN_8);
- Delay(500);
- }
- int main(void)
- {
- LED_Init();
- while (1)
- {
- led_Test();
- }
- }
先来搞定串口。
- #include "UART.h"
- void UART_Init(void)
- {
- USART_InitType USART_InitStructure;
- GPIO_InitType GPIO_InitStructure;
- RCC_EnableAPB2PeriphClk(RCC_APB2_PERIPH_GPIOA | RCC_APB2_PERIPH_AFIO, ENABLE);
- /* Enable USARTy and USARTz Clock */
- RCC_EnableAPB2PeriphClk(RCC_APB2_PERIPH_USART1, ENABLE);
- /* Configure USARTx Tx as alternate function push-pull */
- GPIO_InitStructure.Pin = GPIO_PIN_9;
- GPIO_InitStructure.GPIO_Speed = GPIO_Speed_50MHz;
- GPIO_InitStructure.GPIO_Mode = GPIO_Mode_AF_PP;
- GPIO_InitPeripheral(GPIOA, &GPIO_InitStructure);
- /* Configure USARTx Rx as input floating */
- GPIO_InitStructure.Pin = GPIO_PIN_10;
- GPIO_InitStructure.GPIO_Mode = GPIO_Mode_IN_FLOATING;
- GPIO_InitPeripheral(GPIOA, &GPIO_InitStructure);
-
-
- /* USARTy and USARTz configuration ------------------------------------------------------*/
- USART_InitStructure.BaudRate = 115200;
- USART_InitStructure.WordLength = USART_WL_8B;
- USART_InitStructure.StopBits = USART_STPB_1;
- USART_InitStructure.Parity = USART_PE_NO;
- USART_InitStructure.HardwareFlowControl = USART_HFCTRL_NONE;
- USART_InitStructure.Mode = USART_MODE_RX | USART_MODE_TX;
- /* Configure USARTx */
- USART_Init(USART1, &USART_InitStructure);
- /* Enable the USARTx */
- USART_Enable(USART1, ENABLE);
- }
- int fputc(int ch, FILE* f)
- {
- USART_SendData(USART1, (uint8_t)ch);
- while (USART_GetFlagStatus(USART1, USART_FLAG_TXDE) == RESET);
- return (ch);
- }
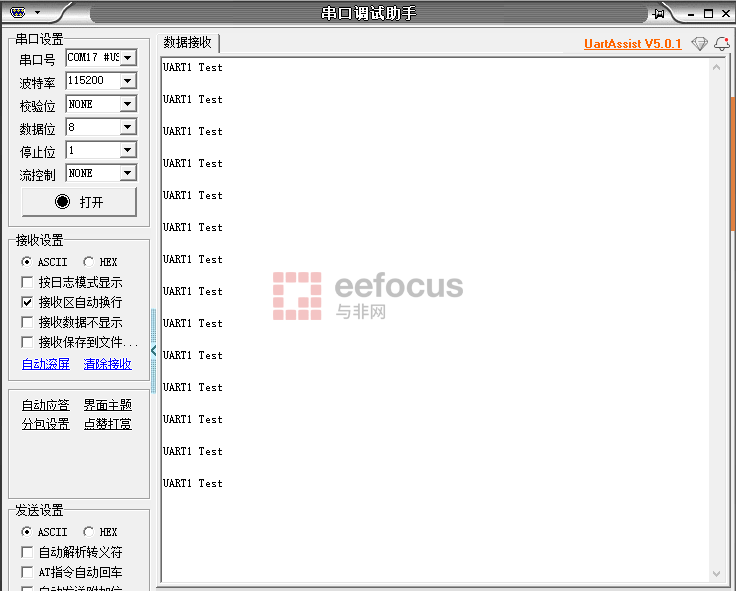
可以看到串口是可以正常使用的。
接下来就是定时器了。
- #include "TIM.h"
- int CountData=0;
- int CountTime=0;
- void NVIC_Configuration(void)
- {
- NVIC_InitType NVIC_InitStructure;
- /* Enable the TIM2 global Interrupt */
- NVIC_InitStructure.NVIC_IRQChannel = TIM1_UP_IRQn;
- NVIC_InitStructure.NVIC_IRQChannelPreemptionPriority = 0;
- NVIC_InitStructure.NVIC_IRQChannelSubPriority = 1;
- NVIC_InitStructure.NVIC_IRQChannelCmd = ENABLE;
- NVIC_Init(&NVIC_InitStructure);
- }
- void Tim_Init(void)
- {
- TIM_TimeBaseInitType TIM_TimeBaseStructure;
- RCC_EnableAPB2PeriphClk(RCC_APB2_PERIPH_TIM1, ENABLE);
- NVIC_Configuration();
- //--
- TIM_TimeBaseStructure.Period = 143;
- TIM_TimeBaseStructure.Prescaler = 999;
- TIM_TimeBaseStructure.RepetCnt = 0;
- TIM_TimeBaseStructure.ClkDiv = 0;
- TIM_TimeBaseStructure.CntMode = TIM_CNT_MODE_UP;
-
- TIM_ConfigPrescaler(TIM1, 0, TIM_PSC_RELOAD_MODE_IMMEDIATE);
- TIM_InitTimeBase(TIM1, &TIM_TimeBaseStructure);
- TIM_ConfigInt(TIM1, TIM_INT_UPDATE, ENABLE);
- TIM_Enable(TIM1, ENABLE);
- }
- void TIM1_UP_IRQHandler(void)
- {
- if (TIM_GetIntStatus(TIM1, TIM_INT_UPDATE) != RESET)
- {
- TIM_ClrIntPendingBit(TIM1, TIM_INT_UPDATE);
- CountData++;
- CountTime++;
- if(CountData==500)
- {
- GPIO_SetBits(GPIOA,GPIO_PIN_8);
- }
- else if(CountData==1000)
- {
- CountData=0;
- GPIO_ResetBits(GPIOA,GPIO_PIN_8);
- }
- }
- }
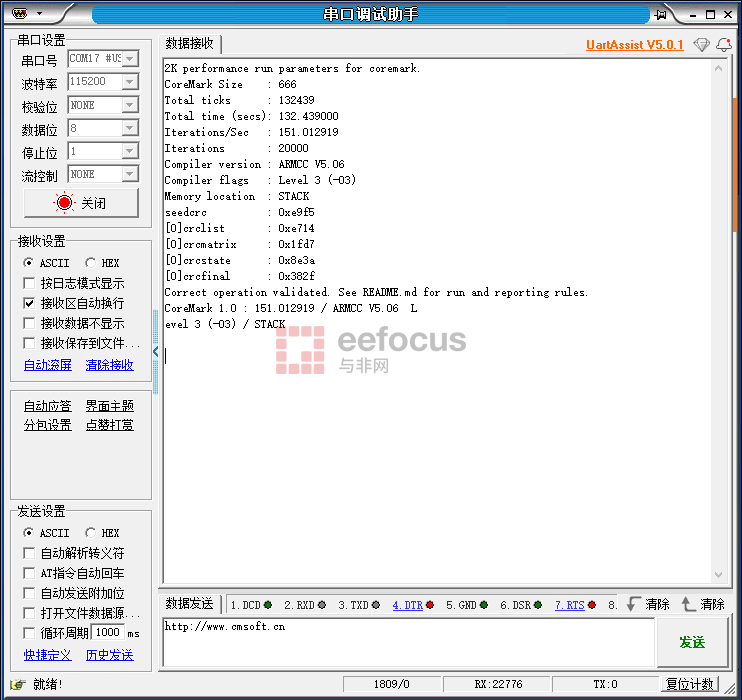
好了,在-o0 的情况下是151分
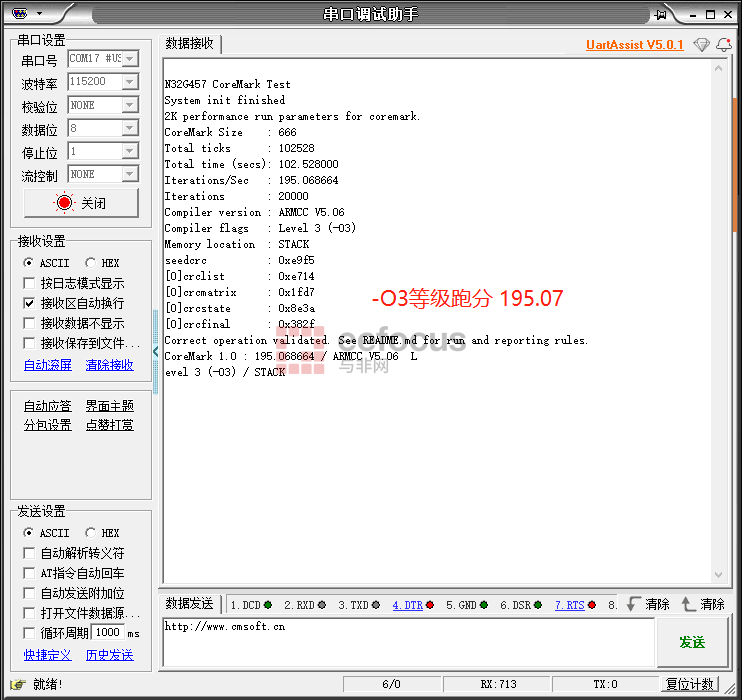
然后我们提升一下优化等级看看。下面的是O3的优化等级的跑 -分:195.07 分数仅供参考
然后就是试用6.0的编译器
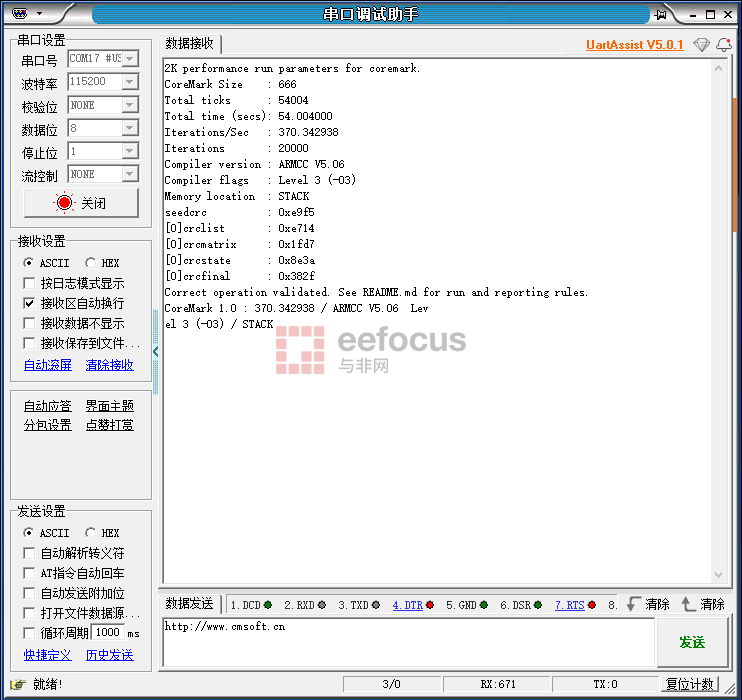
最终370.34分
|
|
 /3
/3 
 /3
/3 