简介: 本文主要介绍Qt应用程序开发工具 Qt [color=inherit !important]Creator 的安装及使用[color=inherit !important]飞凌移植好的 Qt的SDK来搭建Qt应用程序[color=inherit !important]开发环境的方法。 Ubuntu环境:Ubuntu12.04 64bit 应用程序开发工具:Qt Creator2.6.2 64bit Qt sdk版本:Qt5.9 64bit 交叉编译工具版本:arm-linux-gnueabihf-gcc 5.3.1 目标平台:OK[color=inherit !important]A40i-C [color=inherit !important]开发板 (CPU:[color=inherit !important]全志A40i)
来源:[color=inherit !important]飞凌嵌入式 题图:A40i配置清单 作者:燕小飞 时间:2022.2.23
正文开始:
一、Qt 应用程序开发环境搭建
1、安装Qt Creator 并执行
将 qt-creator-linux-x86_64-opensource-2.6.2.bin 拷贝到虚拟机 /root/workspace 路径,执行此文件: cd /root/workspace/ chmod 777 qt-creator-linux-x86_64-opensource-2.6.2.bin ./qt-creator-linux-x86_64-opensource-2.6.2.bin

点击“Next”。
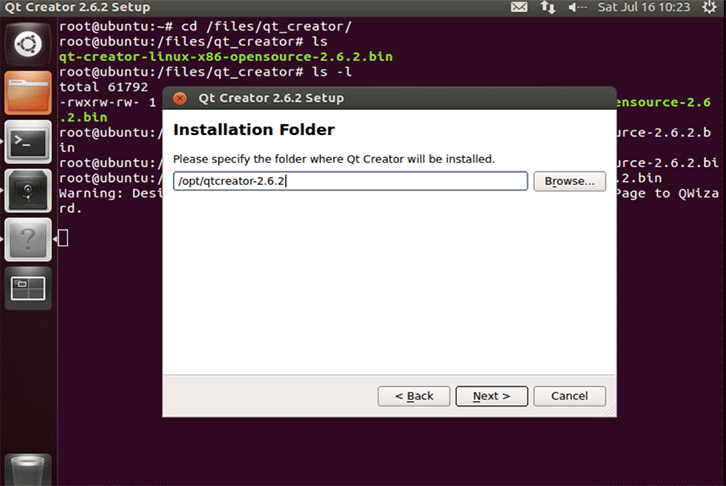
出现安装路径,不用修改使用默认的即可,点击“Next”。
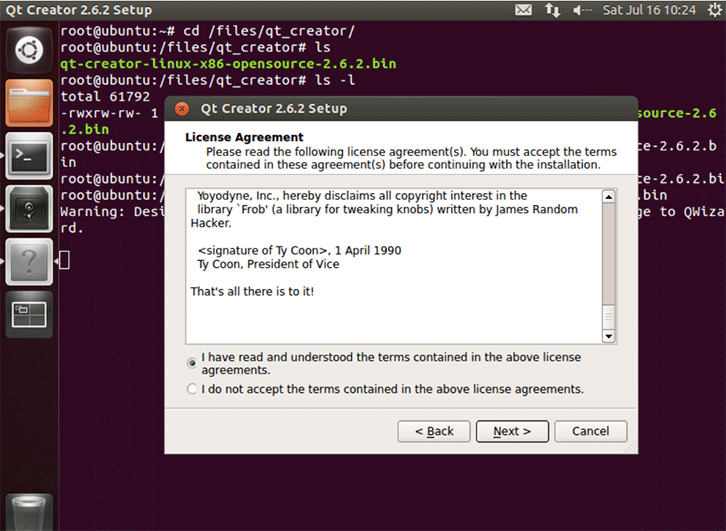
出现许可说明,阅读几秒后,点击“I have read and ...”左侧选项,点击“Next”。
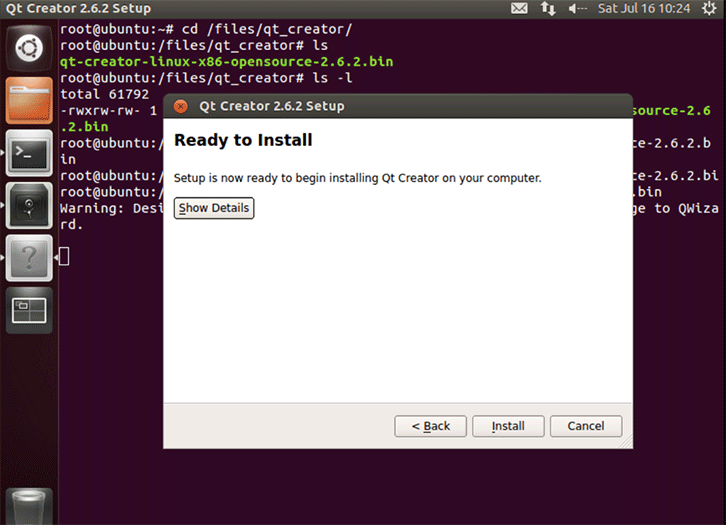
点击“Install”。
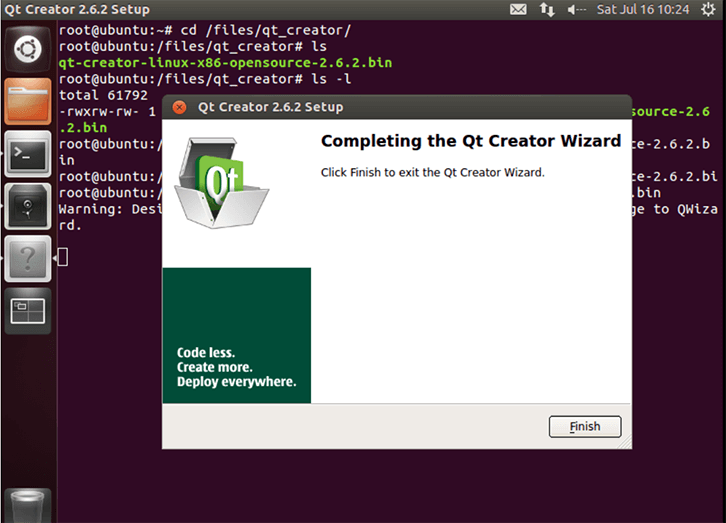
点击“Finish”完成。
2、执行Qt Creator
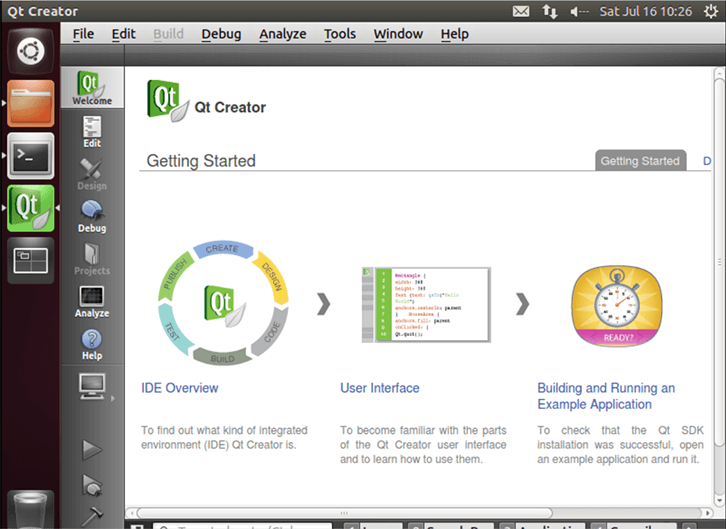
登陆后执行 qtcreator /opt/qtcreator-2.6.2/bin/qtcreator &
3、配置 Qt Creator
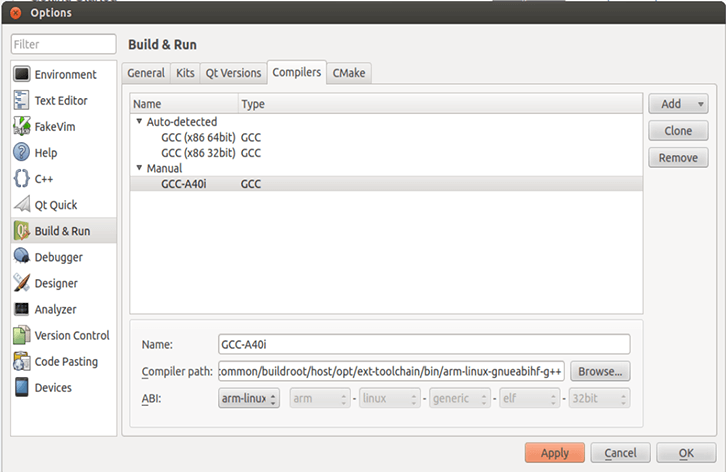
点击 Qt Creator 的 Tools ->Options->Build & Run->Compilers, 然后点击 Add - >GCC。 Name 输入 GCC-A40i; Compiler Path 点击 Browse 选择交叉编译器的路径为 /root/workspace/allwinner/A40i/bsp/lichee/out/sun8iw11p1/linux/common/buildroot/ho st/opt/ext-toolchain/bin//arm-linux-gnueabihf-g++ 如下图所示:
然后点击 Apply。 点击 Qt Creator 的 Qt Versions, 然后点击 Add,弹出对话框选择 /root/workspace/allwinner/A40i/bsp/lichee/buildroot-201611/dl/qt-everywhereopensource-src-5.9.0/Qt-5.9.0/bin/qmake 文件, 点击 Open 添加。 然后会返回 Qt Version 配置框。

Version name 输入 Qt 5.4.1-A40i。 然后点击 Apply。 点击 Qt Creator 的 Kits, 然后点击 Add,出现配置部分。
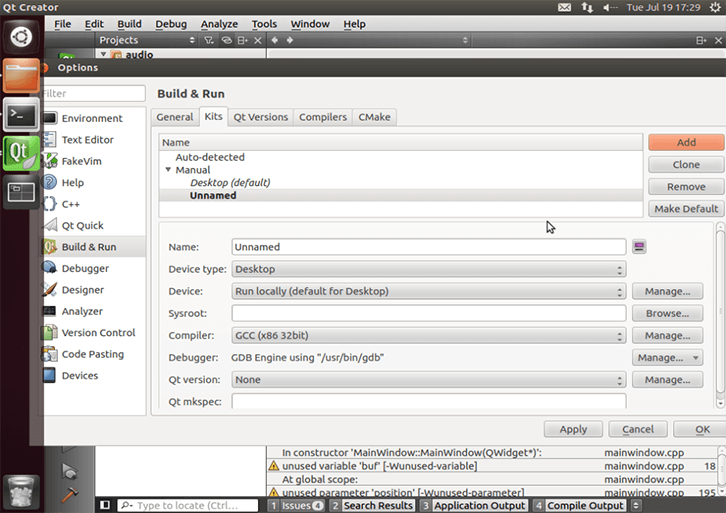
Name 输入 Kits-A40i。 Compiler 选择 GCC-A40i。 Qt version 选择 Qt 5.4.1-A40i。 Sysroot: /root/workspace/allwinner/A40i/bsp/lichee/out/sun8iw11p1/linux/common/buildroot/ho st/usr/arm-buildroot-linux-gnueabihf/sysroot Compiler:GCC-A40i
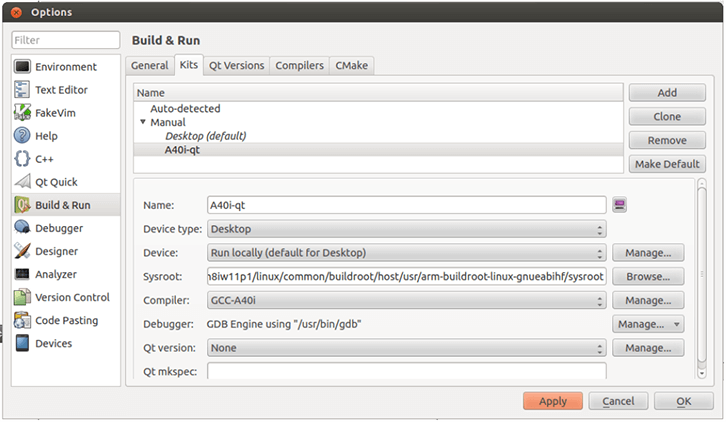
然后点击 Apply 及 OK。
二、应用程序编译及运行
1、打开 backlight 测试程序
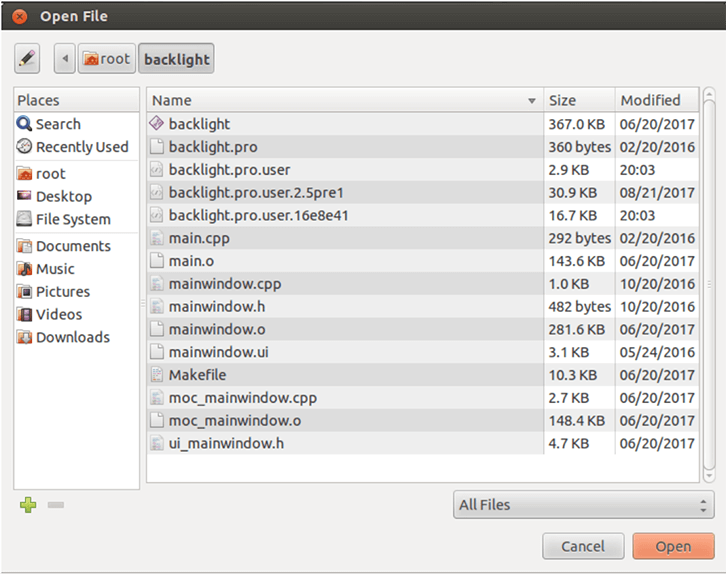
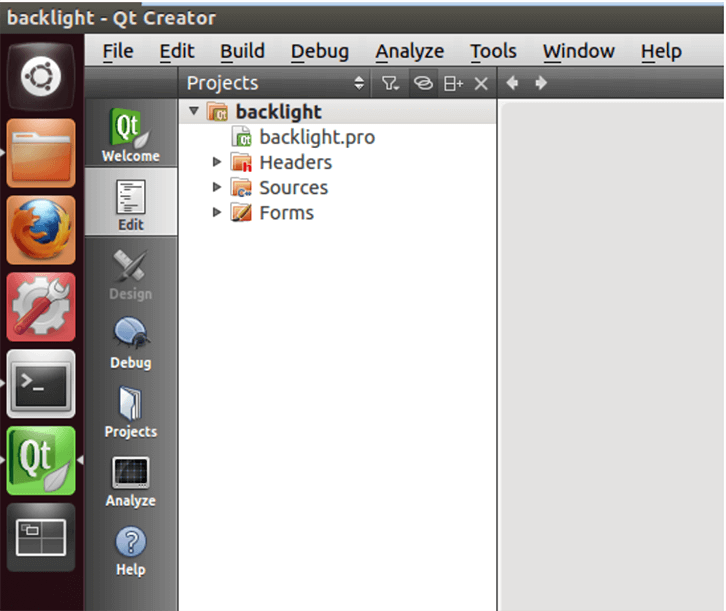
A40i用户资料\[color=inherit !important]Linux\测试程序 \user_rootfs_apps.tar.gz\user_rootfs_apps\qt5\subs\backlight_gui 点击 Qt Creator 的 File->Open File or Project,弹出窗口, 选择 /root/backlight/backlight.pro 输入项目名称和项目路径,如下图:
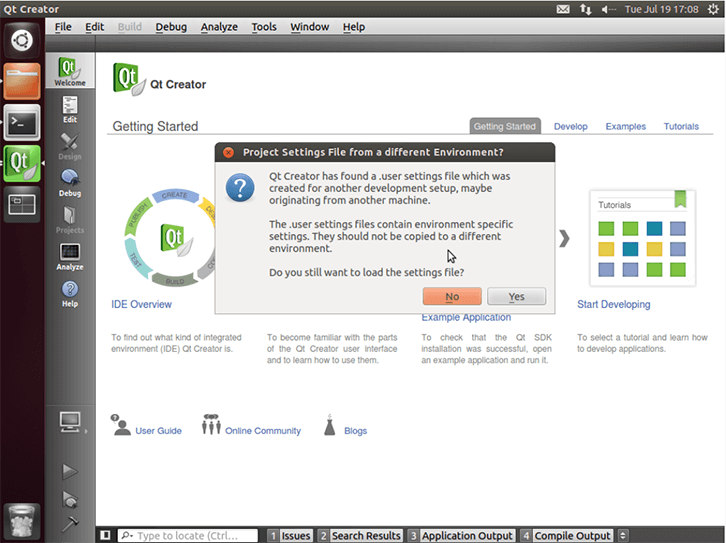
点击 open。弹出是否保留原环境设置的窗口,选择 no,如下:
弹出 Configure Project 窗口,如下:
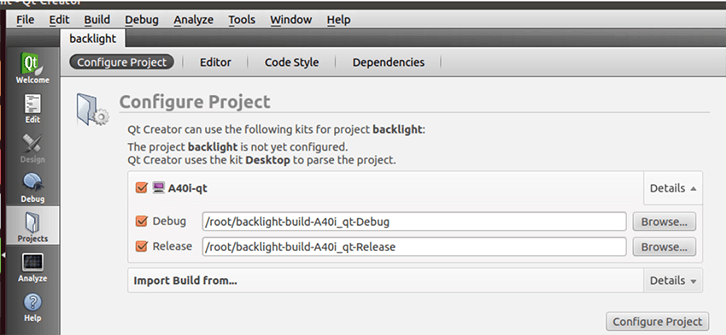
点击 Configure Project, 打开项目后界面如下:
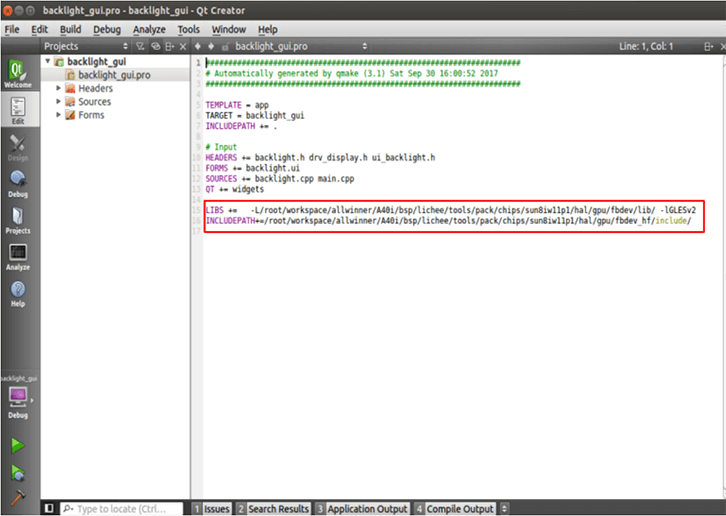
点击 Build->Clean All 进行清空。 点击左侧 projects backlight.pro 打开工程文件添加 GLESv2 动态库 #include INCLUDEPATH+=/root/workspace/allwinner/A40i/bsp/lichee/tools/pack/chips/sun8iw 11p1/hal/gpu/fbdev_hf/include/ #libs LIBS += - L/root/workspace/allwinner/A40i/bsp/lichee/tools/pack/chips/sun8iw11p1/hal/gpu/fbde v_hf/lib/ -lGLESv2 如下图:
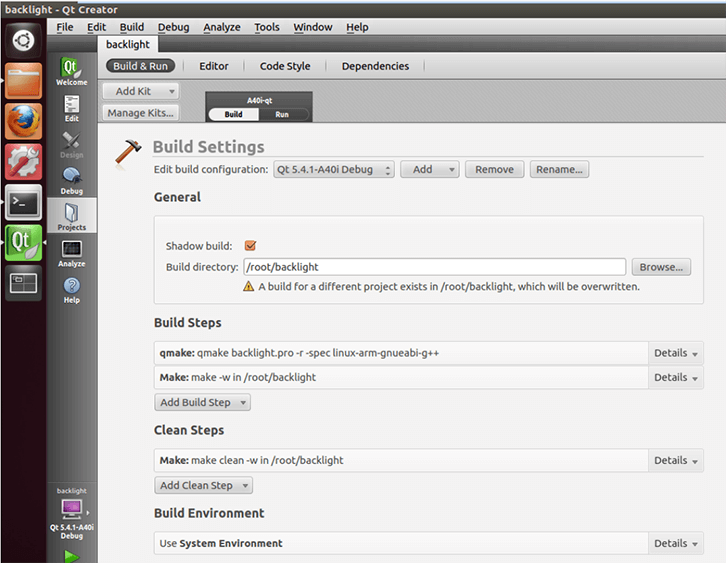
点击左侧 Projects,添加 Qt 所用版本,选择编译文件生成路径。
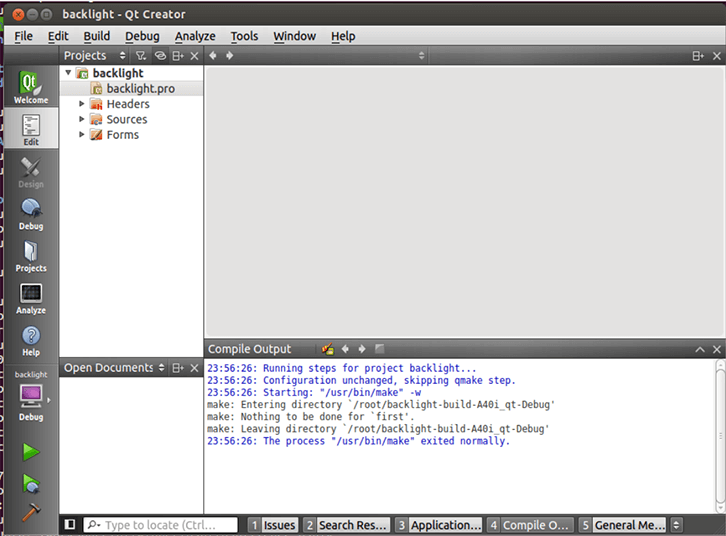
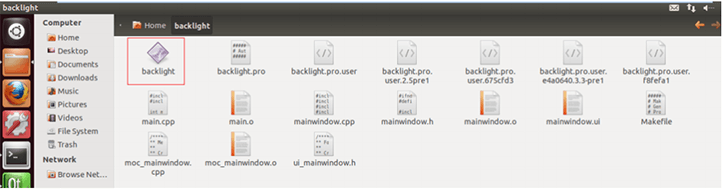
然后点击 Build->Build All 进行编译。 左侧 Build 进度条走完之后代表编译完成,此时在路径/root/backlight/目录下会看到新生成的二进制文件 backlight,如下:
2、测试应用
将测试程序拷贝到OKA40i-C开发板中,进入对应目录,执行测试程序。验证测试程序的正确与否。
3、GDB 使用
使用第一步所示方法编译 Qt 程序 /root/workspace/qt5/Qt-5.9.0/examples/touch/fingerpaint /root/workspace/qt5/Qt-5.9.0/examples/touch/fingerpaint-build-Qt_5_9_0_Qt_5_9_0- Debug/ fingerpaint 复制到 /root/workspace/qt5/Qt-5.9.0/examples/touch/fingerpaint 把 fingerpaint 复制到[color=inherit !important]A40i开发板的/extp/fingerpaint 路径(注:可以使用 ftp、ssh 或者 sd 卡) cd /extp/fingerpaint/ #gdb fingerpaint 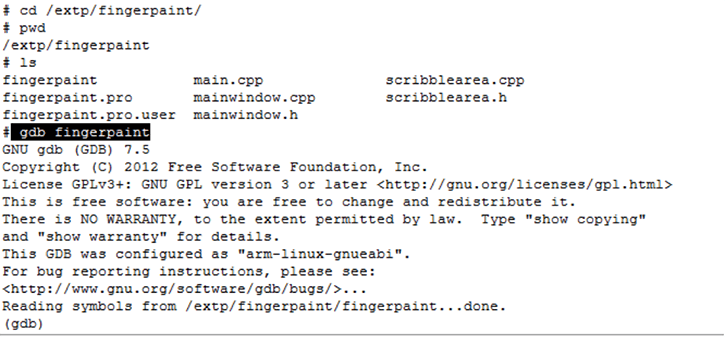
dir /extp/fingerpaint 设置源码搜索路径 list 查看代码 break 59 设置断电到 59 行 run 执行代码,停到 59 行 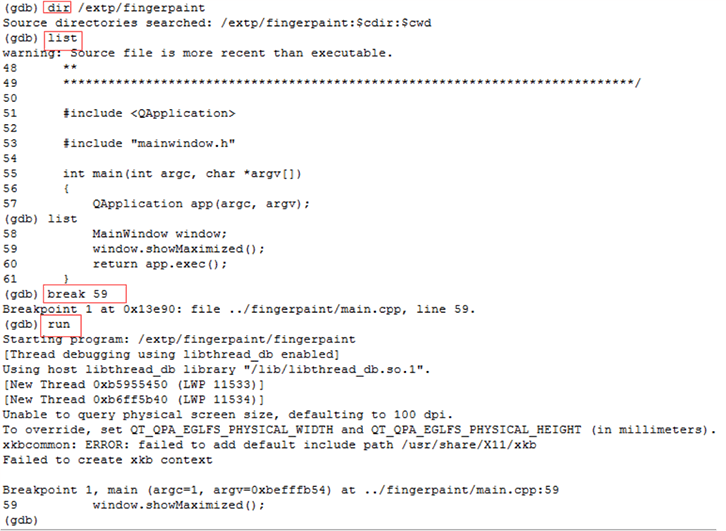
c 从断点继续执行代码 
List MainWindow::MainWindow() 显示 MainWindow::MainWindow 函数的内容 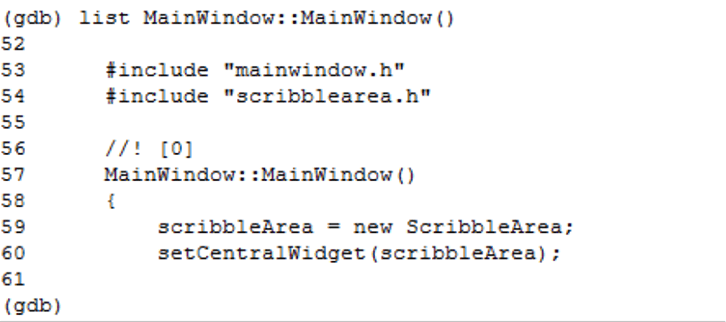
(gdb) b mainwindow.cpp:59 Breakpoint 1 at 0x142f8: file ../fingerpaint/mainwindow.cpp, line 59. (gdb) 设置 mainwindow.cpp 的 59 行断点 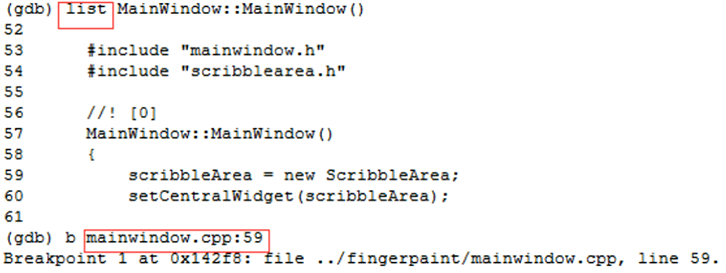
Quit 退出 GDB。
小结: 本文主要适用于飞凌 OKA40i-C开发板 Linux3.10 操作系统,其它开发板也可以参考使用,但是不同开发板之间可能会存在差异,需用户自行修改以适应自己的使用。
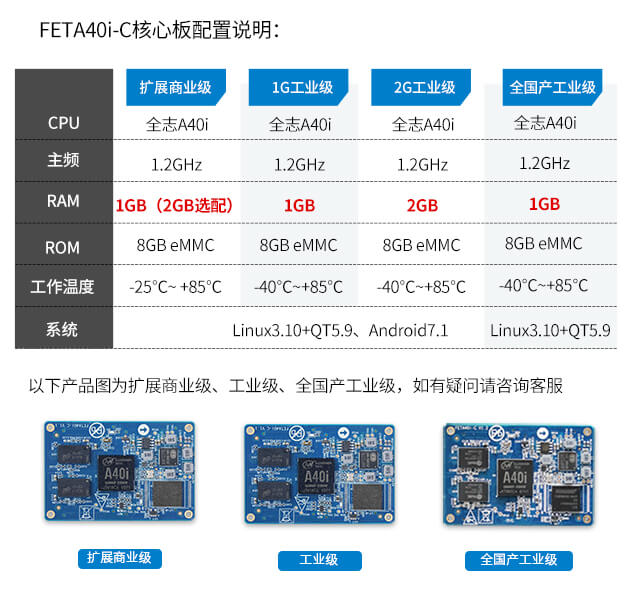
飞凌[color=inherit !important]嵌入式 A40i系列开发板、[color=inherit !important]核心板有多种配置可供选择,并提供全志 [color=inherit !important]T3、 [color=inherit !important]T507等多种不同CPU设计开发板、核心板,具体产品详情您可致电400-699-6866咨询或者联系飞凌嵌入式在线客服,获取详细资料。
| 


 发表于 2022-4-21 11:52:34
 1/2
1/2 

