本帖最后由 tom2339 于 2021-6-19 17:25 编辑
FireBeetle ESP32-E
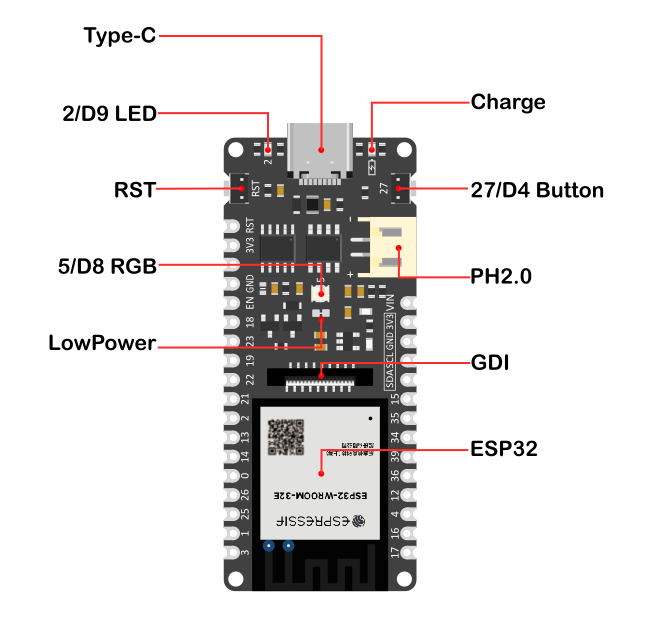
FireBeetle ESP32-E是一款基于ESP-WROOM-32E双核芯片的主控板,它专为IoT设计。
它支持WIFI和蓝牙双模通信并具有体积小巧、超低功耗、板载充电电路、接口易用等特性。可灵活的用于家庭物联网改装、工业物联网改装、可穿戴设备等等。
通过和IFTTT等物联网平台的连接,你可轻松制作出你独有的特色物联网智能家居系统。
FireBeetle ESP32-E深度支持ArduinoIDE编程,并且即将支持Scratch图形化编程及MicroPython编程。 我们提供了详细的在线教程和应用案例,以及上千种免焊接的Gravity接口传感器与执行器,可轻松上手制作,大幅度降低你的学习时间。邮票孔的设计,让它可以方便的嵌入你设计的PCB上,大大缩减你的原型开发成本以及原型测试时间。
FireBeetle ESP32-E说明文档
- Arduino IDE 编译环境配置
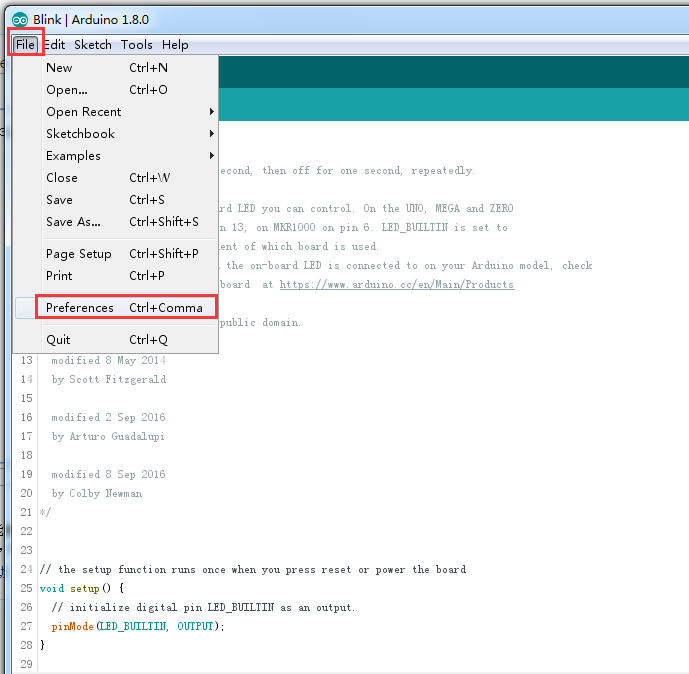
- 配置URL网址到Arduino IDE 打开Arduino IDE,点击File->Preferences,如下图所示:
在新打开的界面中,点击如下图红色圆圈中的按钮
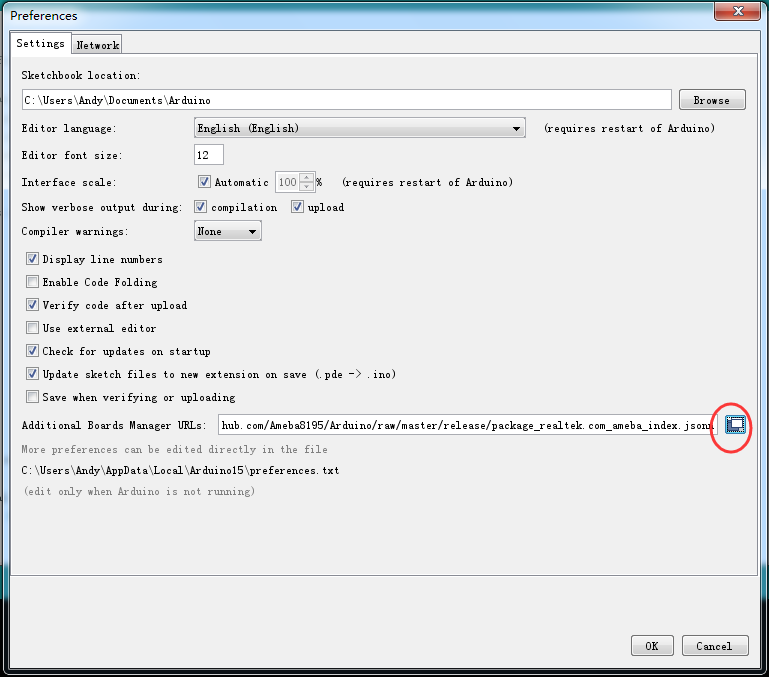
将如下链接地址复制到新弹出的对话框中:http://download.dfrobot.top/FireBeetle/package_DFRobot_index.json
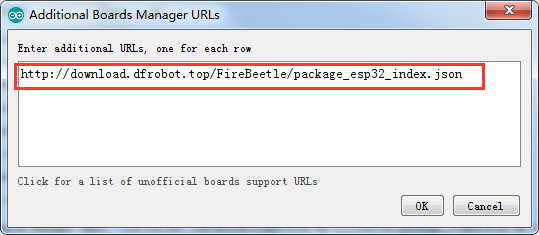 - 点击OK
- 更新板卡
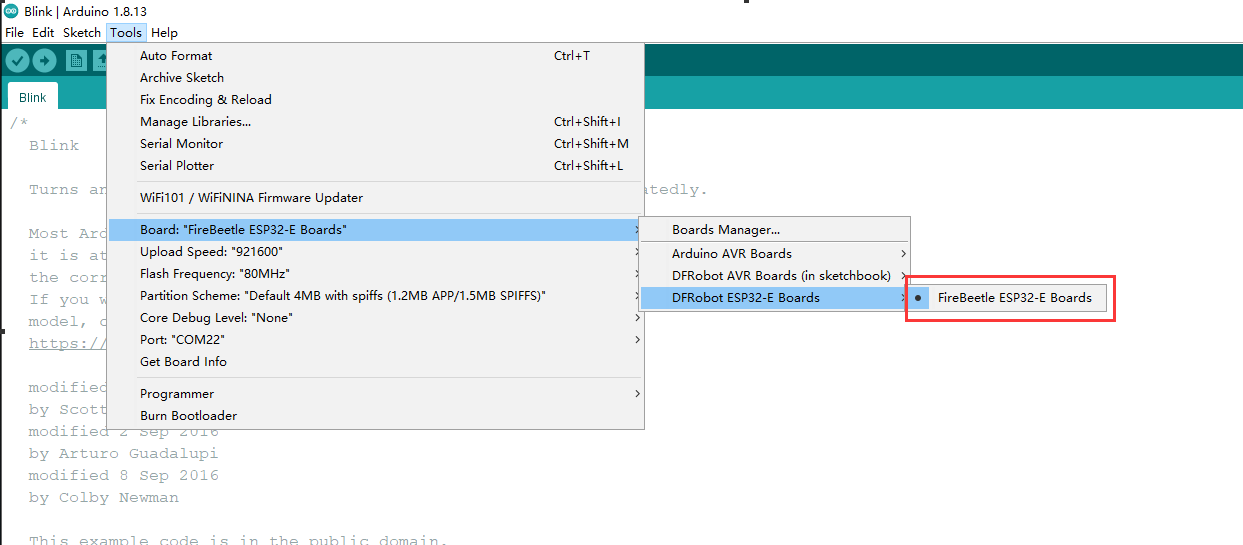
打开Tools->Board:->Boards Manager...,如下图所示: 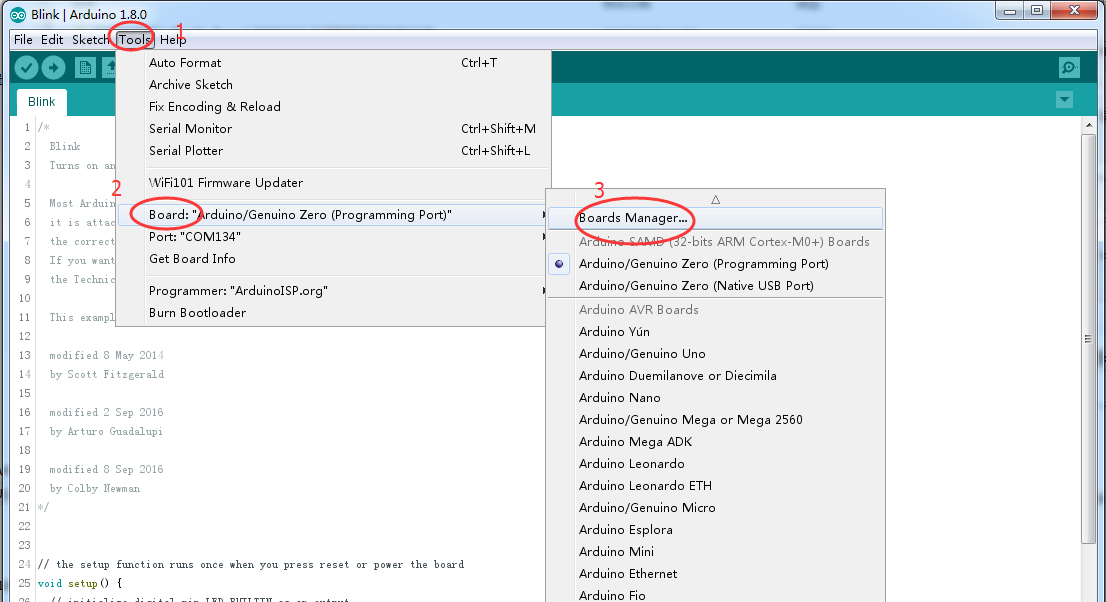
Boards Manager会自动更新板卡,如下图所示:
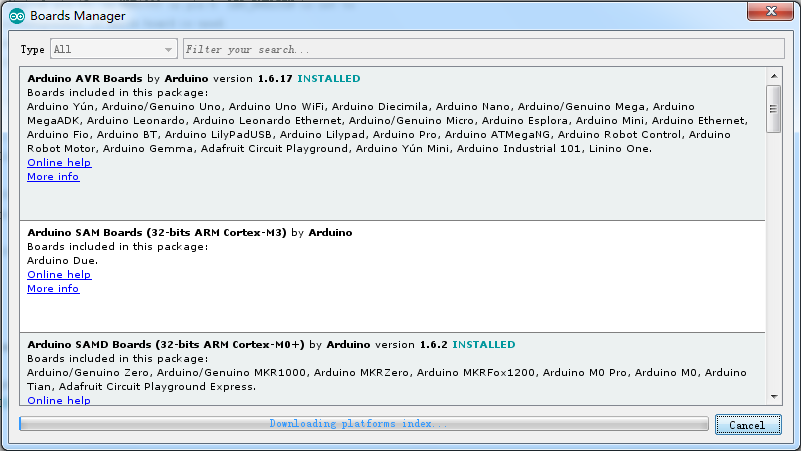
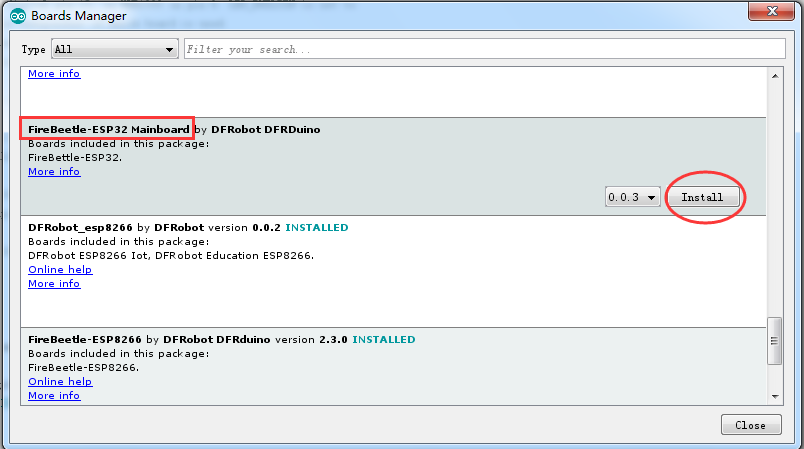
更新完成后,会在列表中看到FireBeetle-ESP32主板(现已更新至0.0.8版本),点击安装:
 - 选择主板与端口
我使用的arduino ide的版本是1.8.15,不能很好的下载程序,经常出现连不上开发板的现象,后来我使用了arduino ide2.0的测试版,才能正常下载程序,
在这里我使用了示例中的SimpleWIFIsever编译完成后,需要按一下RST键,才能正常下载程序。ESP32具有WIFI功能,以下示例使用ESP32创建了一个wifi服务器,使用客户端连接到该服务器,遥控LED的亮灭 - /*
- WiFiAccessPoint.ino 创建了一个wifi热点并提供了一个web服务
- Steps:
- 1. 连接到这个wifi "yourAp"
- 2. 访问 http://192.168.4.1/H 来开灯或者访问http://192.168.4.1/L 来关灯
- OR
- Run raw TCP "GET /H" and "GET /L" on PuTTY terminal with 192.168.4.1 as IP address and 80 as port
- */
- #include <WiFi.h>
- #include <WiFiClient.h>
- #include <WiFiAP.h>
- // 设置你的wifi与密码
- const char *ssid = "esp32";
- const char *password = "";
- WiFiServer server(80);
- void setup() {
- pinMode(LED_BUILTIN, OUTPUT);//将LED引脚设置为输出模式
- Serial.begin(115200);
- Serial.println();
- Serial.println("Configuring access point...");
- // 配置wifi以及获取IP地址.
- WiFi.softAP(ssid, password);
- IPAddress myIP = WiFi.softAPIP();
- Serial.print("AP IP address: ");
- Serial.println(myIP);
- server.begin();
- Serial.println("Server started");
- }
- void loop() {
- WiFiClient client = server.available(); // listen for incoming clients
- if (client) { // if you get a client,
- Serial.println("New Client."); // print a message out the serial port
- String currentLine = ""; // make a String to hold incoming data from the client
- while (client.connected()) { // loop while the client's connected
- if (client.available()) { // if there's bytes to read from the client,
- char c = client.read(); // read a byte, then
- Serial.write(c); // print it out the serial monitor
- if (c == '\n') { // if the byte is a newline character
- // if the current line is blank, you got two newline characters in a row.
- // that's the end of the client HTTP request, so send a response:
- if (currentLine.length() == 0) {
- // HTTP headers always start with a response code (e.g. HTTP/1.1 200 OK)
- // and a content-type so the client knows what's coming, then a blank line:
- client.println("HTTP/1.1 200 OK");
- client.println("Content-type:text/html");
- client.println();
- // the content of the HTTP response follows the header:
- client.print("Click <a href="/H">here</a> to turn ON the LED.<br>");
- client.print("Click <a href="/L">here</a> to turn OFF the LED.<br>");
- // The HTTP response ends with another blank line:
- client.println();
- // break out of the while loop:
- break;
- } else { // if you got a newline, then clear currentLine:
- currentLine = "";
- }
- } else if (c != '\r') { // if you got anything else but a carriage return character,
- currentLine += c; // add it to the end of the currentLine
- }
- // Check to see if the client request was "GET /H" or "GET /L":
- if (currentLine.endsWith("GET /H")) {
- digitalWrite(LED_BUILTIN, HIGH); // GET /H turns the LED on
- }
- if (currentLine.endsWith("GET /L")) {
- digitalWrite(LED_BUILTIN, LOW); // GET /L turns the LED off
- }
- }
- }
- // close the connection:
- client.stop();
- Serial.println("Client Disconnected.");
- }
- }


|  /2
/2 


 发表于 2021-6-19 17:08:31


