|
|
一、概述
纯Python语言没法在资源有限的单片机上运行,于是我们采用了上位机和硬件通讯方式来实现用Python控制硬件设备,需要占用硬件设备一个串口,同时硬件设备里需要烧入通讯固件。
Python语言有很多现成的库可用,我们可以借助Python语言结合硬件设备做很多实际应用。比如用PyQt5可以做图形界面上位机,用Plotly绘图库做数据采集和分析等虚拟实验工具。 二、硬件设置
1. 安装天问Blcok
打开天问Block官方网站,点击链接下载并安装。
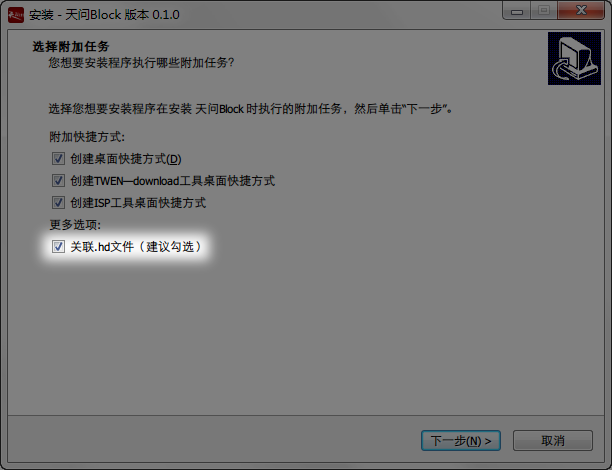
为了方便软件使用,建议勾选关联软文件扩展名。
软件安装完成后将跳出驱动安装。

默认点击下一步直到安装成功。 2. 烧写Python通讯固件
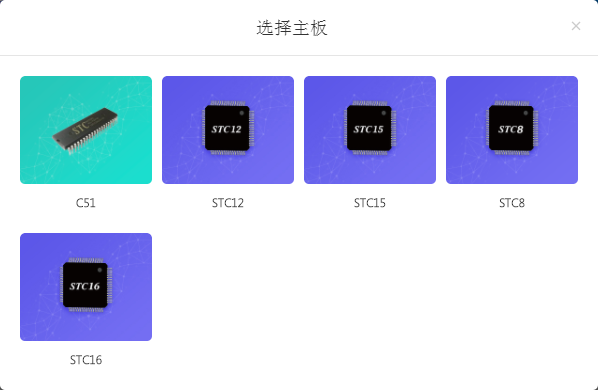
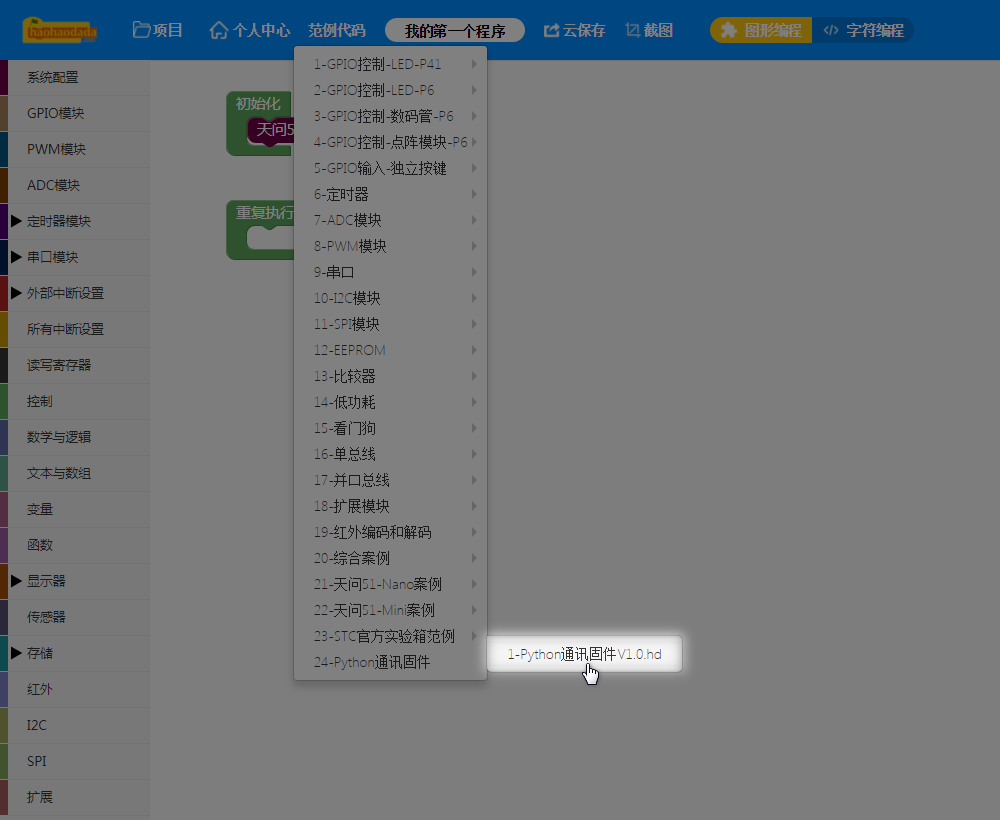
打开天问Block软件,首先会提示选择主板,这里我们根据天问51主板选择STC8/16。
 Python通讯固件V1.0.hd
打开固件。

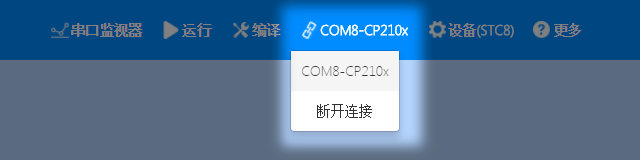
查看对应的串口。
查看设备管理器。
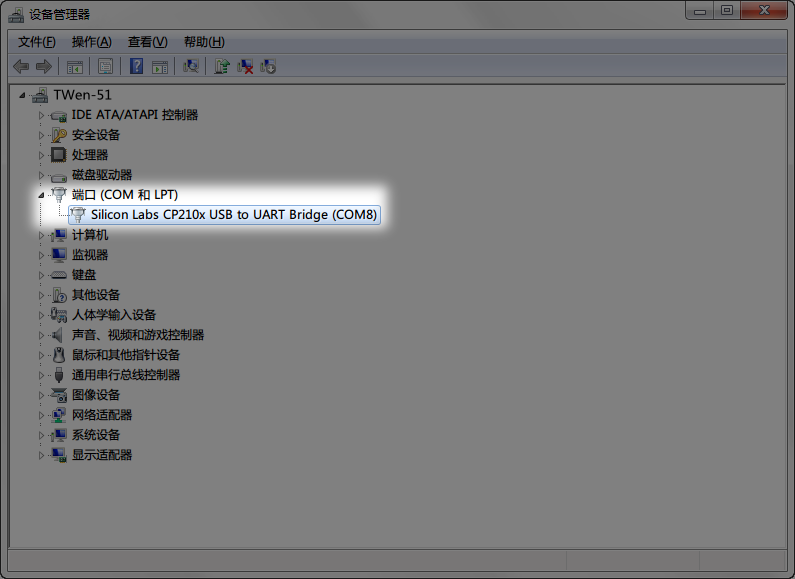
确认端口对应,这里都为COM8。
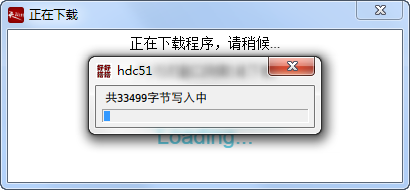
点击右上角运行,完成下载固件。

跳出下载窗口。
 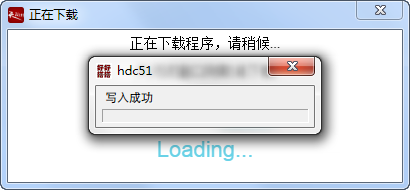
下载完成后,窗口自动关闭。 三、Python环境设置Python环境安装
*使用Python 3.6以上版本
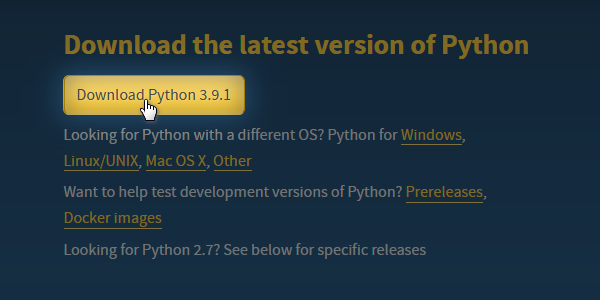
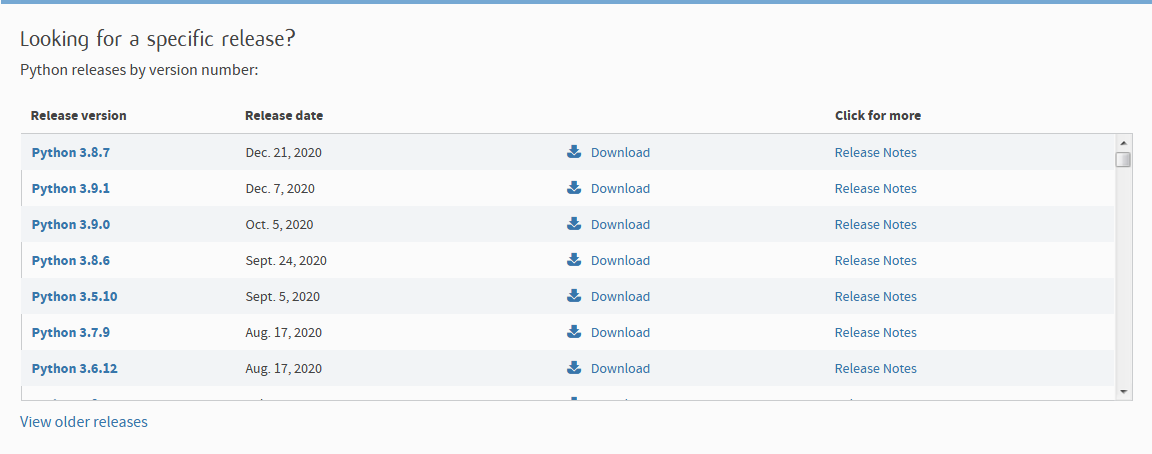
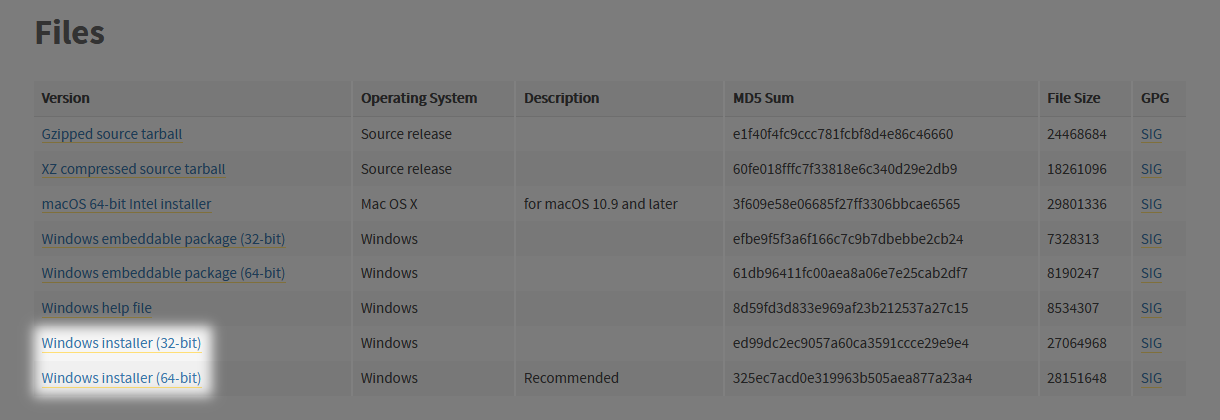
- 为了方便用户使用,已提供Windows版Python 3.8.7安装包(32位/64位),如需其他版本,请自行下载,下载方法可查看文后阅读材料(第2页)。
Windows版本安装时在选项中勾选添加Python到环境变量,点击下一步直到安装完成。
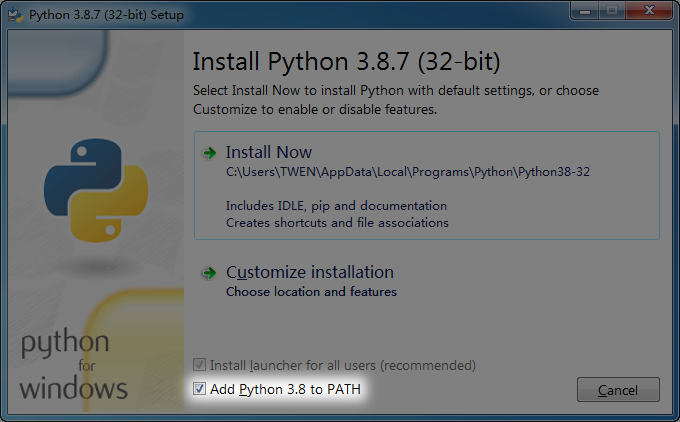
*如选择自定义安装,勾选下图中选项。

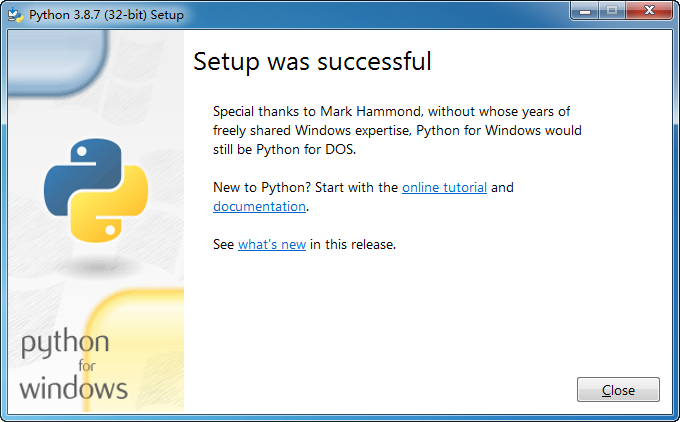
安装成功。
Pyserial依赖包安装
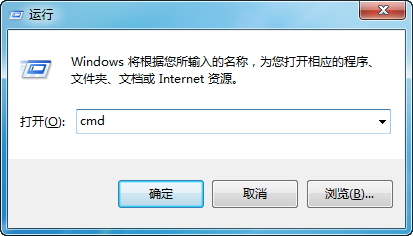
使用系统快捷键WIN + R运行CMD命令行。
[color=rgb(51, 102, 153) !important]复制代码
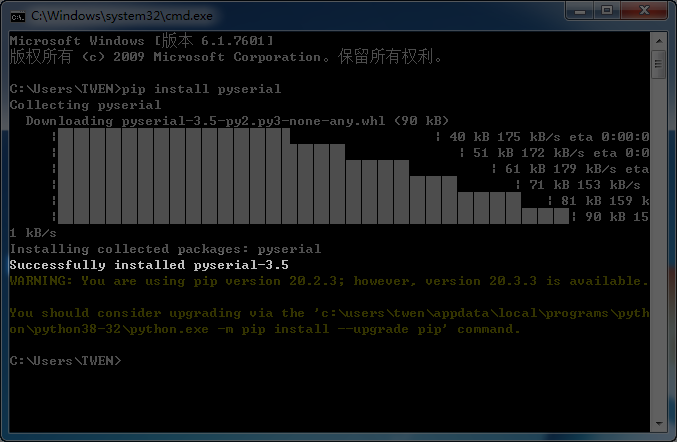
提示安装成功。 四、运行示例程序下载天问Python包
下载地址:  天问51-Python.zip (2.58 MB, 下载次数: 7) 天问51-Python.zip (2.58 MB, 下载次数: 7)
使用Python IDLE打开Python通讯框架目录,需要使用的文件如下。
key.py keypad.py light.py matrix.py mixed.py motor.py nixietube.py ntc.py oled.py qma7981.py TWen.py analogRead.py buzzer.py digitalRead.py digitalWrite.py
其中TWen.py为主要库文件,每次运行程序时都需要在头部调用。
[color=rgb(51, 102, 153) !important]复制代码
运行LED闪烁案例
以下为LED的调用范例程序。
digitalWrite.py
- from TWen import *
- if __name__ == '__main__':
- board = TWen()
- board.start('COM8')
- board.digitalWrite(P41, 0);
- while True:
- sleep(0.2);
- board.digitalWrite(P41,1);
- sleep(0.2);
- board.digitalWrite(P41,0);
[color=rgb(51, 102, 153) !important]复制代码
更改对应的串口,串口与下载Python通讯固件时选择的一致。
[color=rgb(51, 102, 153) !important]复制代码
1. 使用Python IDLE
通过Python IDLE打开digitalWrite.py。
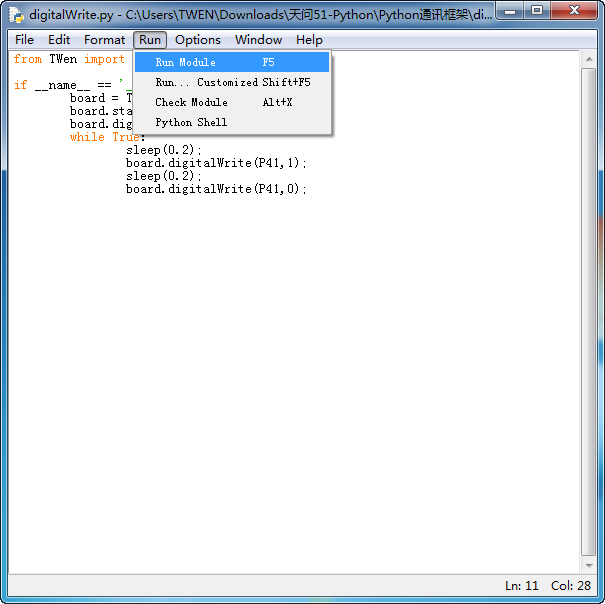
点击运行程序。
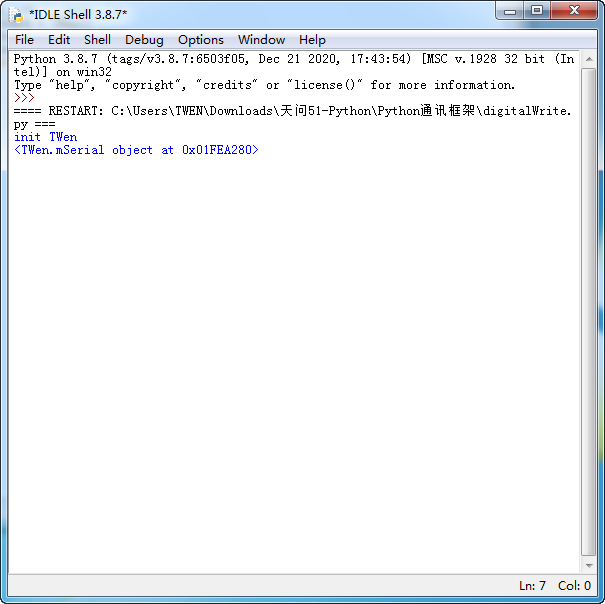
程序运行成功,LED闪烁。 2. 使用命令行运行
使用系统快捷键WIN + R运行CMD命令行。

使用cd命令跳转到项目文件夹,然后使用python *.py运行文件。
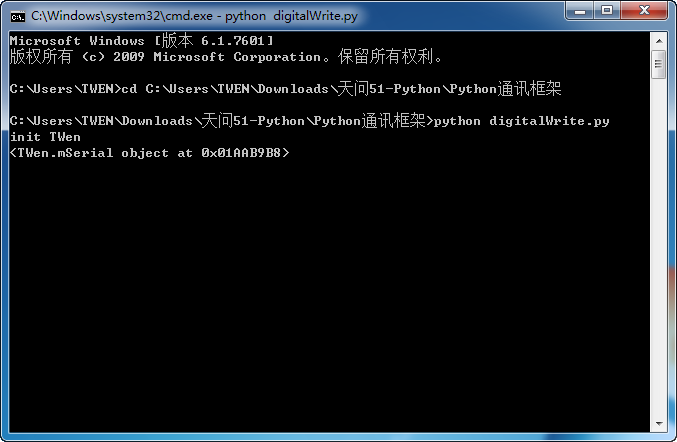
程序运行成功,LED闪烁。 五、API接口说明- Start
- TWen()
- start( serialport )
- GPIO
- digitalWrite( pin, level )
- digitalRead( pin, def onResult )
- ADC
- analogRead( pin, def onResult )
- PWM
- Actuator
- motor( speed )
- buzzer( freq, duty )
- Sensors
- Light Sensor
- Temperature Sensor
- Keypad
- Key1~4
- key1( def onResult )
- key2( def onResult )
- key3( def onResult )
- key4( def onResult )
- QMA7981
- Display
- Matrix
- matrixDisplay( buffer )
- matrixDisplayNum( value )
- Nixietube
- nixietube_num( value )
- nixietube_float( value )
- nixietube_time( h, m, p )
- nixietube_time2( h, m, p )
- OLED
六、Python IDE推荐
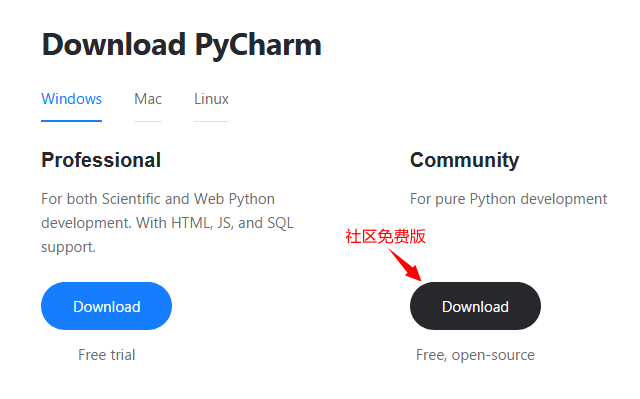
前面我们都是用最原始的文本工具运行Python程序,使用起来会有很多不方便的地方,比如关键词高亮、提醒、调试等,所以一般建议使用专门的IDE来编写Python程序,能起到事半功倍的效果。这里推荐使用PyCharm社区免费版,软件的具体使用网上很多教程,不再做详细赘述。
下载地址:https://www.jetbrains.com/pycharm/download/
 阅读材料:Python安装包下载
|
|


 发表于 2021-5-26 10:45:27
 /1
/1 

